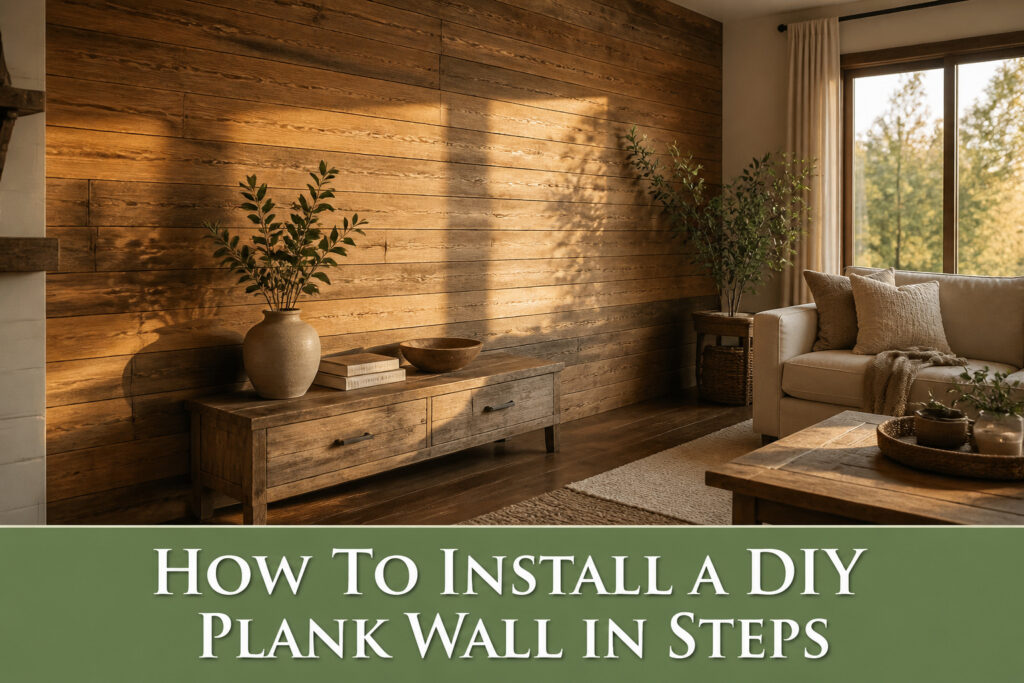
A finished plank wall in a living room or bedroom runs about $150 in plywood and supplies, plus a weekend of cutting and nailing.
Most first-timers get the boards up fine, then skip painting the wall behind them first and watch every gap turn into a dark shadow they cannot fix.
One sheet of ¼-inch plywood rips into eight six-inch planks at the store, which is where the real savings start.
[link-whisper-related-posts]1. Measure the Wall and Order Material
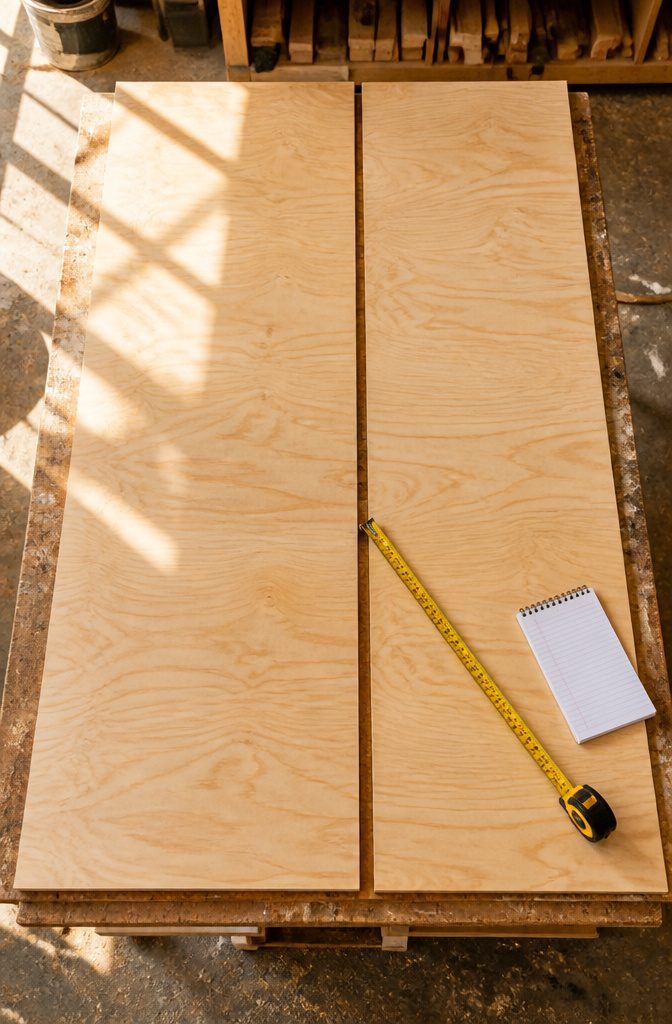
Plywood sheets run about $14 for a 4 by 8 foot sheet at the big box stores, and one of those sheets ripped into 6 inch planks gives you eight boards.
Two sheets gets sixteen planks, which covered my wall with a few extras left for mistakes. The 1/4 inch thickness sits nearly flush against existing baseboards, so you skip the trim removal that thicker stock demands.
Measure your wall height and width in inches, divide the width by six, and that is your plank count across. Add about fifteen percent more for bad cuts and the weird piece that splits at the end.
I always round up on sheets; leftover plywood becomes shop projects later, but running short means a second trip mid-install.
Paint the wall before the planks go up, and match that paint to your finished plank color.
Gaps happen, especially around knots or where boards cup slightly, and a dark wall behind light wood reads as shadow you cannot sand away.
I learned this the hard way on a pine project where red wallpaper peeked through every knot; now I roll the wall color on first and let it dry overnight.
2. Select the Plank Material
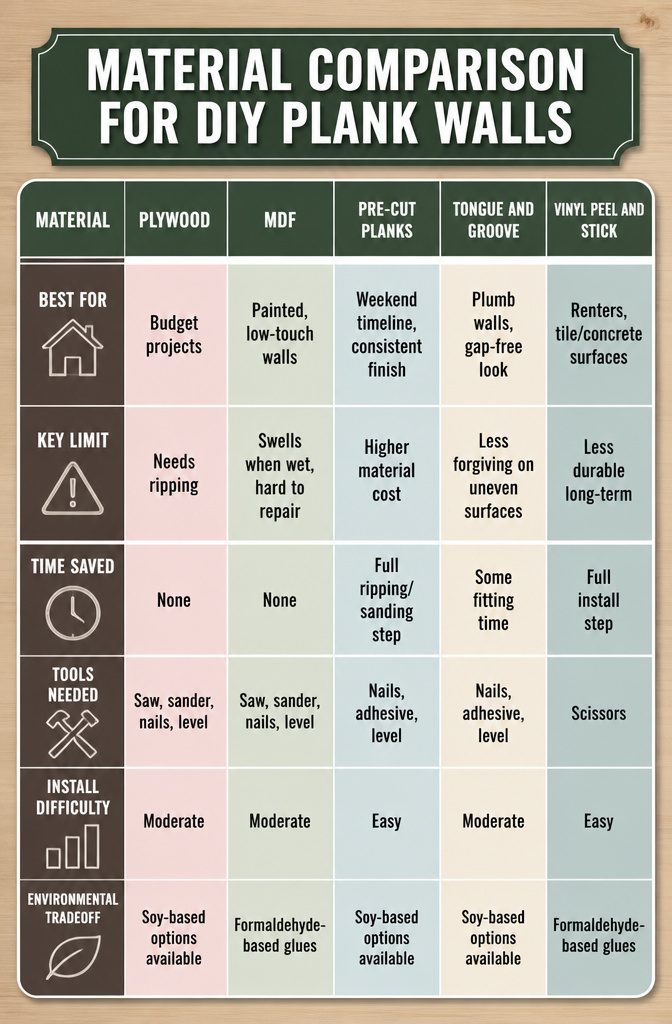
Plywood gives the most control for the dollar, which is why most first-timers end up there. A ¼-inch sanded pine plywood sheet runs about $22 at Home Depot, and four sheets covered my last wall for $88 in material.
The store will rip it into planks for you, though the straightness of those cuts varies by location. I would not count on perfection; plan to check each strip against a level before it goes up.
MDF looks smooth in the aisle and costs less, but it swells when wet even after painting, and sanding out the damage is miserable.
Vinyl peel-and-stick planks skip studs and power tools entirely, scissors are enough, and they stick to tile or concrete where nails won’t work. The downside is durability; a wall that gets bumped or sunlit will show it.
Pre-cut planks like PureBond save a weekend of ripping and sanding, and tongue-and-groove boards lock straight without gaps if your wall is plumb.
Environmental tradeoffs sit mainly in the adhesive binders: standard MDF and some vinyls carry formaldehyde-based glues, while pre-cut plywood lines often advertise soy-based alternatives.
| Material | Best For | Key Limit | Time Saved |
|---|---|---|---|
| Plywood | Budget projects, custom widths | Needs ripping, variable store cuts | None |
| MDF | Painted, low-touch walls | Swells when wet, hard to repair | None |
| Pre-cut planks | Weekend timeline, consistent finish | Higher material cost | Full ripping/sanding step |
| Tongue and groove | Plumb walls, gap-free look | Less forgiving on uneven surfaces | Some fitting time |
| Vinyl peel and stick | Renters, tile/concrete surfaces | Less durable long-term | Full install step |
3. Cut the Planks to Width
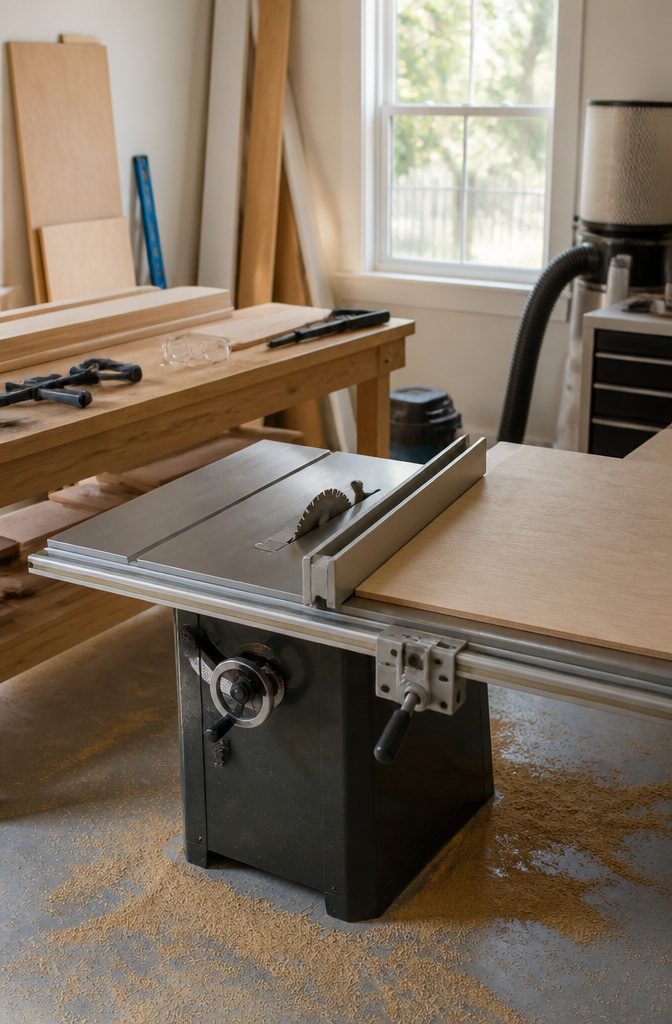
Most plywood sheets come in 4′ by 8′ panels, and ripping them into 6-inch planks gives you a proportion that reads as real shiplap rather than skinny strips.
A table saw makes this straightforward if you already own one or can borrow from a neighbor.
Set the fence, keep both hands on the material past the blade, and wear safety glasses because the saw kicks up a surprising amount of fine dust along with the chips.
The guard sits close to the wood, so push sticks matter here more than on wider cuts.
If you do not have a table saw, the cutting desk at a home improvement store will handle it for a few dollars total. One shopper had sixteen rips done for four bucks.
Many stores set a 12-inch minimum width for their saw guard, so you may need to ask nicely and test one board first.
That same guard limitation usually leaves the last strip from each sheet at 12 inches, which works fine as a starter piece or for above a door.
Reclaimed wood skips this step entirely if you find boards already in the 6- to 8-inch range, though the widths will vary and the rustic look is not for every room.
4. Sand the Edges Smooth
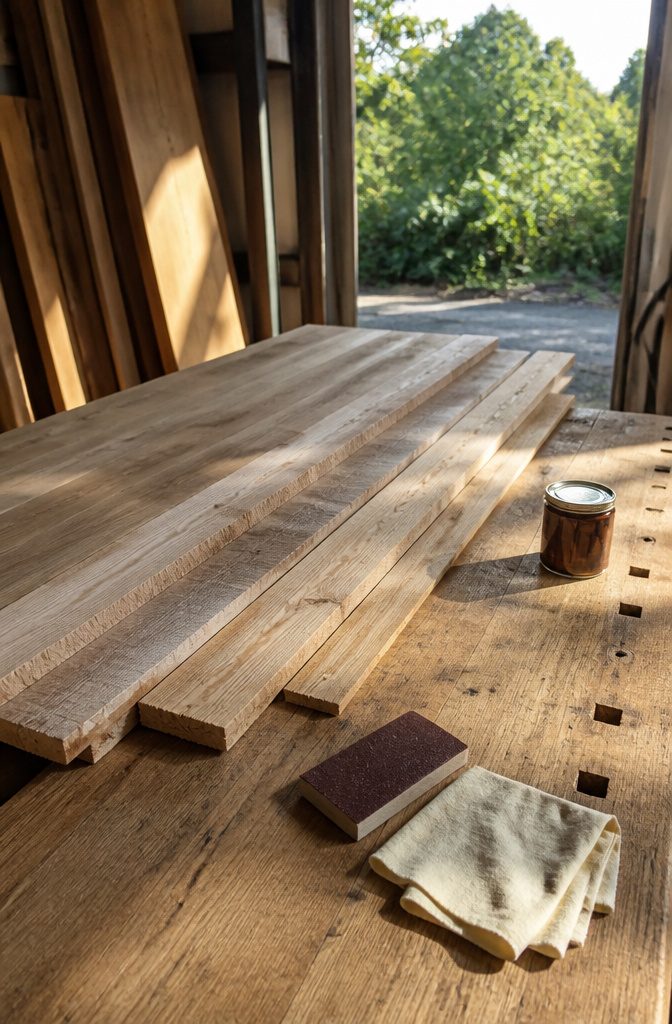
Rough edges where the saw left the wood grain raised will telegraph straight through paint and catch dust in stain. Run a sanding block with 220-grit paper along every cut side of every plank before you install a single piece.
The face usually does not need touching if you bought finish-grade material, but the ripped edges definitely do, and the ends where the miter saw chewed through.
Sand with the grain, never across it, or you will leave scratches that only show up after the finish goes on. One quick pass is enough; you just want to knock down the burrs, not reshape the plank.
A tack cloth clears the dust afterward, though a clean damp rag works in a pinch if you let the wood dry before bringing out the nail gun.
I skipped this once on a pantry wall and spent two coats of paint trying to hide the whiskers; it never really worked.
5. Mark the Stud Locations
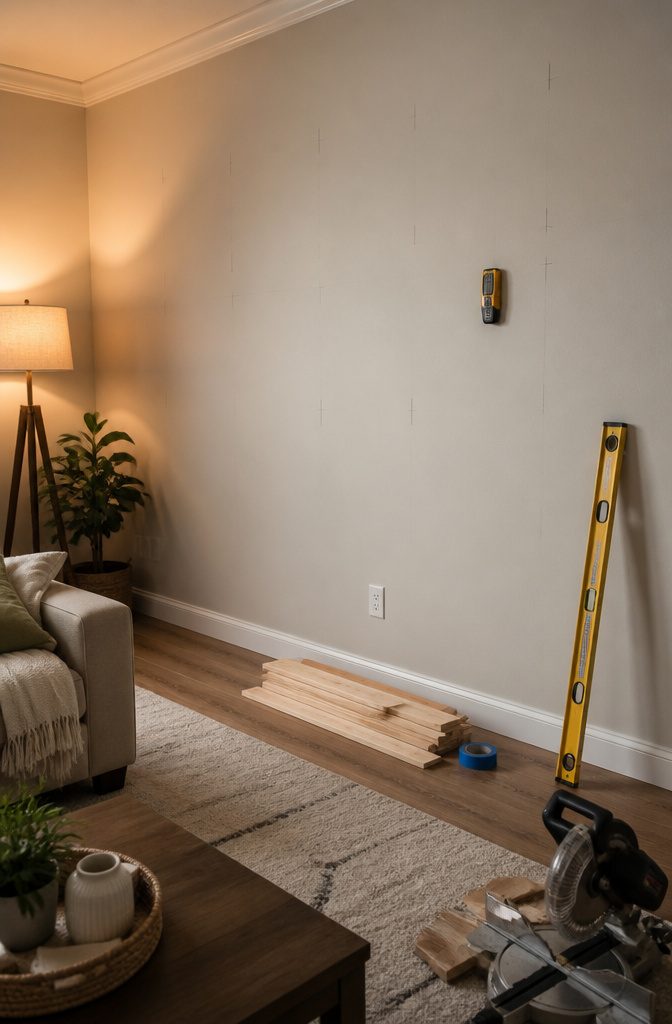
A stud finder worth about eight dollars at the hardware store will save you from a wall full of nails that miss their mark.
Run it along the wall in a horizontal sweep until it signals a stud, then mark that spot with a pencil.
Most walls built after the 1950s place studs 16 inches on center, so once you locate the first one you can measure across in 16-inch increments and find the rest without rescanning.
The source passages confirm this spacing exactly, and it is reliable enough that some installers skip the stud finder entirely after the first hit.
The vertical line you draw from ceiling to floor is your nailing guide for every plank that follows.
Drywall alone will grip a nail for a day or two, then slowly let go as the house shifts and the plank’s weight pulls downward. The stud is the only solid anchor.
Mark your lines an inch or two above where the top plank will sit so the pencil mark stays visible as you work upward.
6. Attach the First Plank Level
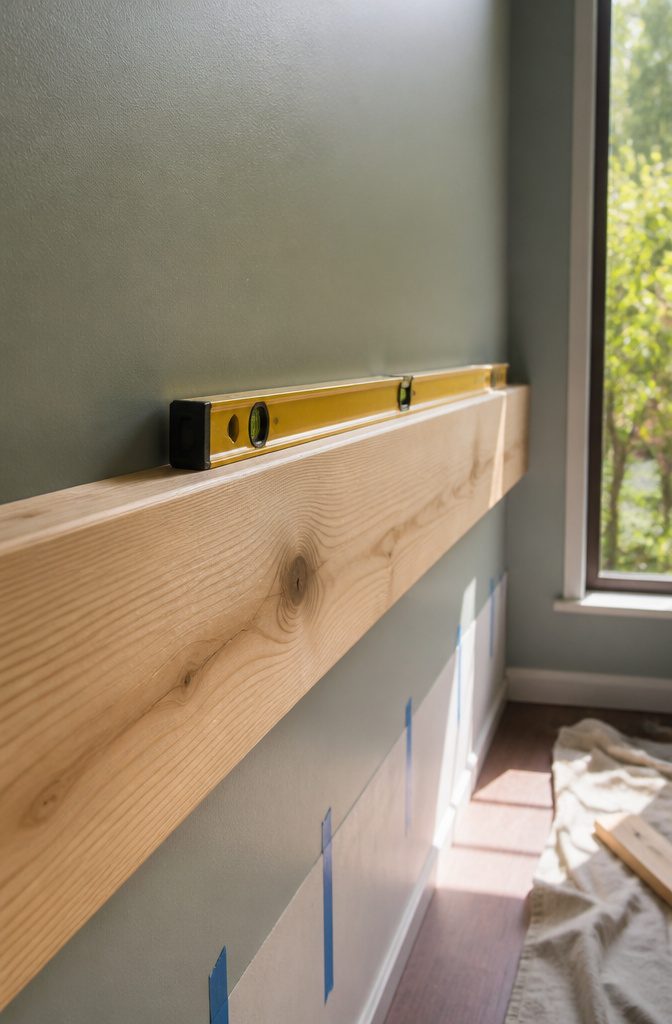
The first board sets everything that follows, so start at the top or the bottom and make it dead level. I have seen both work.
Starting at the ceiling gives you a clean line where the wall meets the trim most people notice first; starting at the floor lets you use another plank as a spacer and hide the gap behind baseboard later.
Whichever end you choose, mark a level line across the wall with a long level before the plank goes up. Two people help here: one to hold the eight-foot board, one to check both ends at once.
If the first plank tilts even a little, every row below it tilts too, and by the fifth row you are staring at a ski slope.
Drive a 1¼-inch brad nail through the face of that first board into every stud, one near the top edge and one near the bottom.
Keep the lower nails low enough that baseboard will cover them if you started at the bottom; if you started at the ceiling, the gap gets trimmed later either way.
A nail gun saves time, but a hammer and patience work.
After this row is solid and level, the rest of the wall mostly takes care of itself as long as you push each new plank flush to the one before it.
7. Continue with Spacers and Staggered Seams
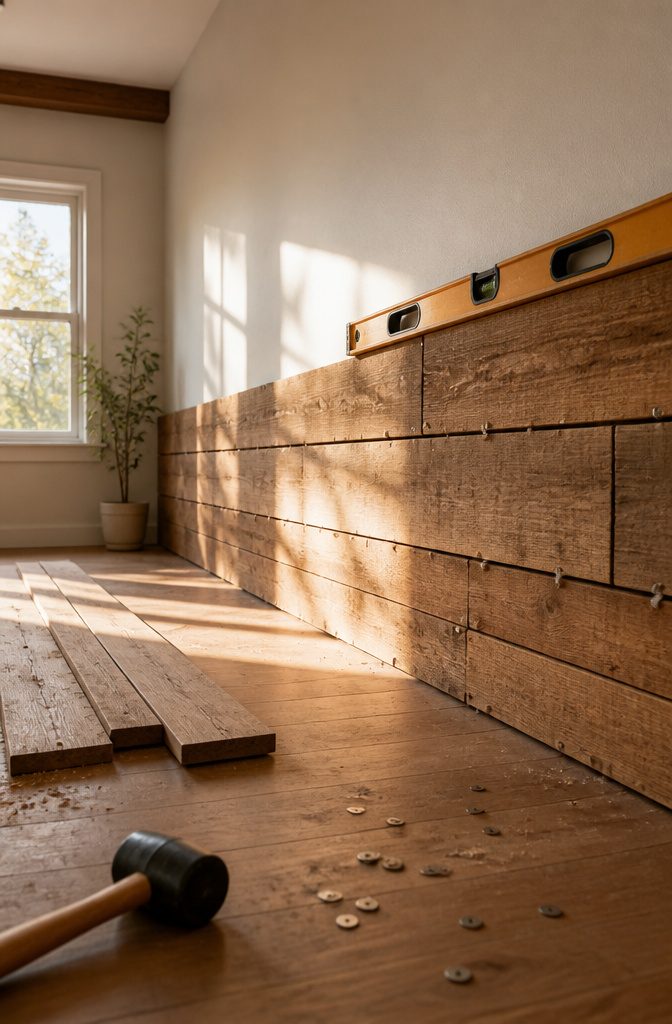
Nickels work better than they have any right to. The edges are thin enough to slip between planks without fighting, thick enough to leave a gap that reads as intentional, and heavy enough that gravity does the holding.
I keep a small stack in my back pocket and replace them as I go; after a few rows the copper picks up enough sawdust to feel like shop equipment.
Stagger every seam by at least twelve inches, the way hardwood flooring demands. Adjacent joints line up like a grid and the wall looks assembled, not grown.
The Tetris comparison holds: you are fitting remnants forward, measuring each piece against the gap left by the last, not repeating a single repeating pattern.
Scrap plywood cut to ¼ inch works if nickels feel too small in your fingers, though the plywood squares are harder to keep track of on a crowded floor.
Level each plank before the nail gun comes out. The spacer holds the gap; the level holds the line.
Trust one and ignore the other, and the error compounds down the wall faster than you can backtrack.
Corners matter most: butted planks that do not match flush read as amateur from across the room, while a seam staggered into the corner disappears entirely behind the turn.
8. Cut Around Outlets and Switches
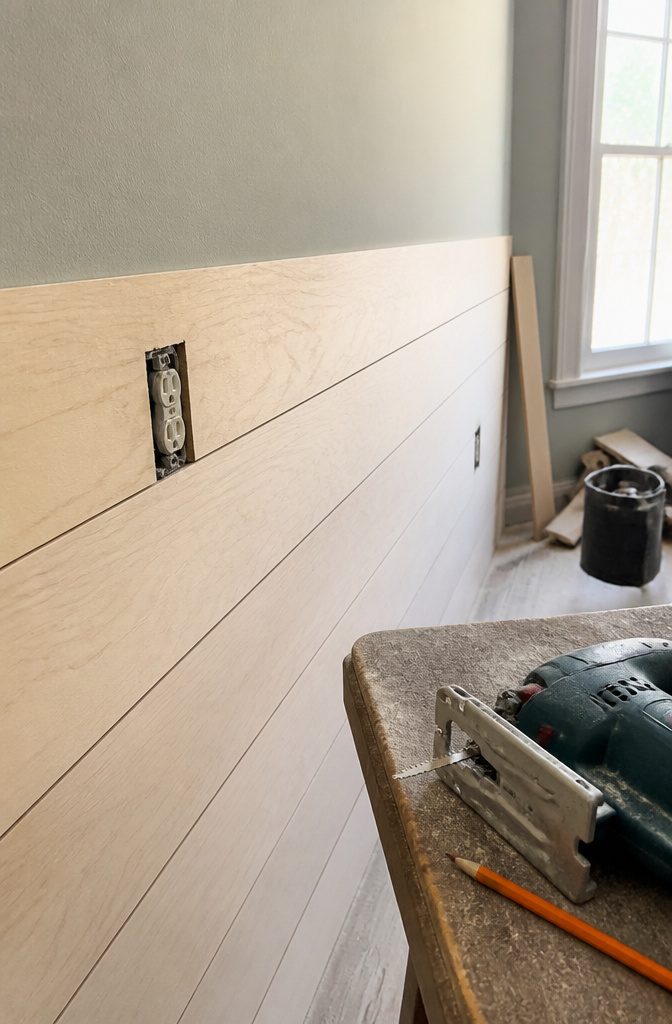
Outlets are where a plank wall either looks fitted or looks like a weekend mistake, and the difference is usually five minutes of measuring against five seconds of guessing.
Turn the power off at the breaker first; the plates come off, and the outlet itself gets unscrewed so it can sit slightly out from the box.
That gap lets the plank slide behind the ears of the outlet, which then gets tightened back down over the wood instead of butting against it.
The screws that held the original plate will be too short now, so swap them for longer ones, available at any hardware store.
Mark the cutout on the plank with the outlet’s exact position, accounting for any spacer gap that falls in that same space.
A jigsaw handles the cut; keep the blade just inside the line so the fit is snug rather than gappy.
For a cleaner edge, some installers prefer outlet extenders instead of recessing the wood behind, which skips the screw-swapping entirely but leaves the plate sitting slightly proud of the wall.
Either approach works; mixing them on the same wall does not.
9. Fill and Sand the Nail Holes
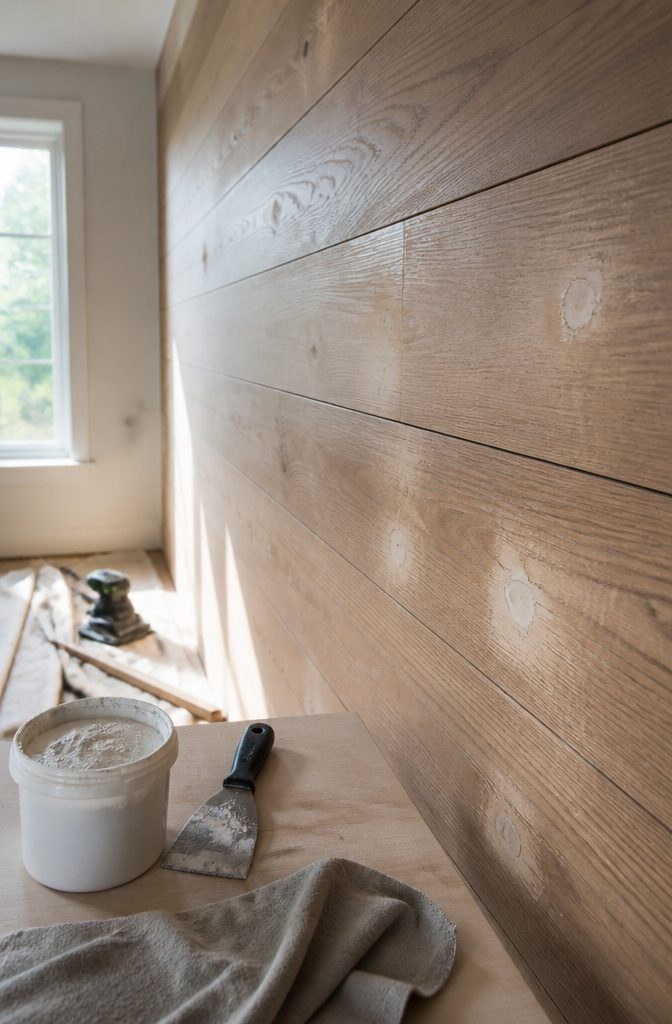
Painter’s putty goes into every nail hole with a putty knife, pushed flush and scraped clean. The putty I used needed 24 hours to dry fully, and rushing that step shows later as shrinkage or a halo under paint.
Once hardened, a 180-220 grit sanding block knocks the bumps flat; follow with a tack cloth so dust does not lodge in the grain.
Caulking is where you decide how finished the wall needs to look. I ran caulk only where the quarter round met the drywall, skipping the gaps between planks to avoid digging dried caulk out of narrow cracks later.
Corners and ceiling lines get the same treatment if you want the planks to read as one continuous surface rather than individual boards.
The paint touch-up after, on the puttied holes and any primed trim, is what finally erases the construction story.
10. Paint or Stain the Finished Wall
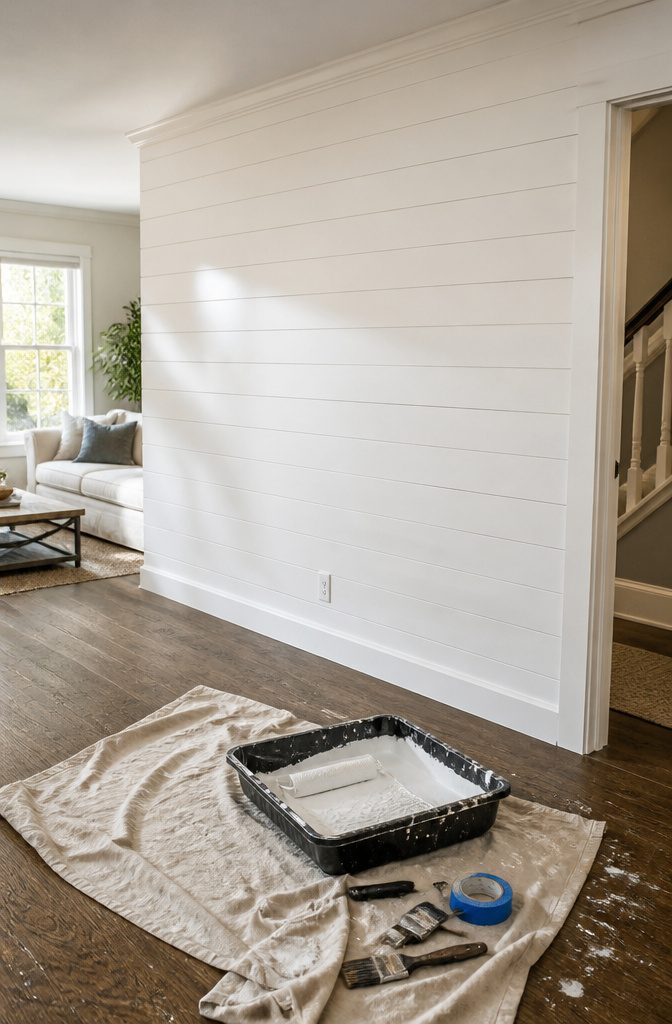
The finish you choose changes how much the wall feels like furniture versus architecture. Paint reads as part of the room; stain lets the wood stay the story.
Either way, three coats of white paint covered the raw pine without primer in my own build, and the color held true.
Benjamin Moore Simply White matched the trim finish exactly, which kept the kitchen from looking like two projects that happened at different times.
Caulk is the step most first-timers skip and later regret. The corners where planks meet the ceiling, the countertop, and each other need a thin bead to read as one surface, not a stack of boards.
For paint, frog tape against the surrounding wall saves the edge; roll horizontally with the planks so the texture follows the grain.
If the wood is rough, 400-grit sandpaper between coats knocks down the raised grain that paint leaves behind, and a tack cloth picks up the dust before the next layer.
Stain demands a different patience. For vertical grain, stain performance varies enough that testing on your actual wood beats any generic type recommendation.
Test your chosen finish on a cutoff plank first; vertical surfaces catch light differently than horizontal ones, and a color that looks warm on a table can read orange on a wall.
Tools You Will Need
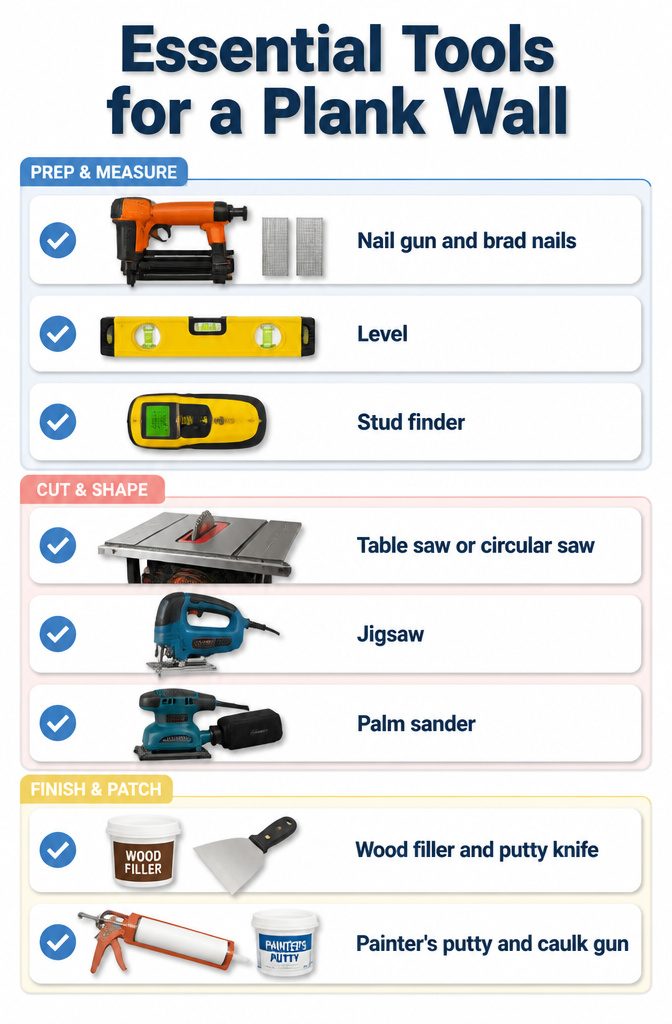
A full diy plank wall kit fits in the trunk of most sedans, which matters when you are driving home from the lumber yard on Saturday morning.
The upfront investment is smaller than most people guess, and every tool earns its keep on later projects.
- Nail gun and brad nails in both 1¼″ and 2″ lengths: a finish nailer saves hours over hand-nailing, and the two sizes let you switch between thin plywood backing and heftier boards
- Level: a 24″ level works for short walls, but a 48″ model marks a truer line across anything wider than a hallway
- Stud finder: marking stud locations vertically before you lift the first plank keeps the rhythm steady
- Table saw or circular saw: ripping the sheets into 6″ planks yourself saves a trip, though most big-box stores will cut them for you if you ask at the desk
- Jigsaw: outlets and switches are never where you want them; this is the only clean way to notch around them
- Palm sander: the edges of store-cut plywood splinter, and 220 grit smooths them enough that filler can disappear
- Wood filler and a putty knife: the nail holes will show under paint or stain otherwise
- Painter’s putty and caulk gun: quarter round at the seams hides gaps where walls are not quite square
What This Costs
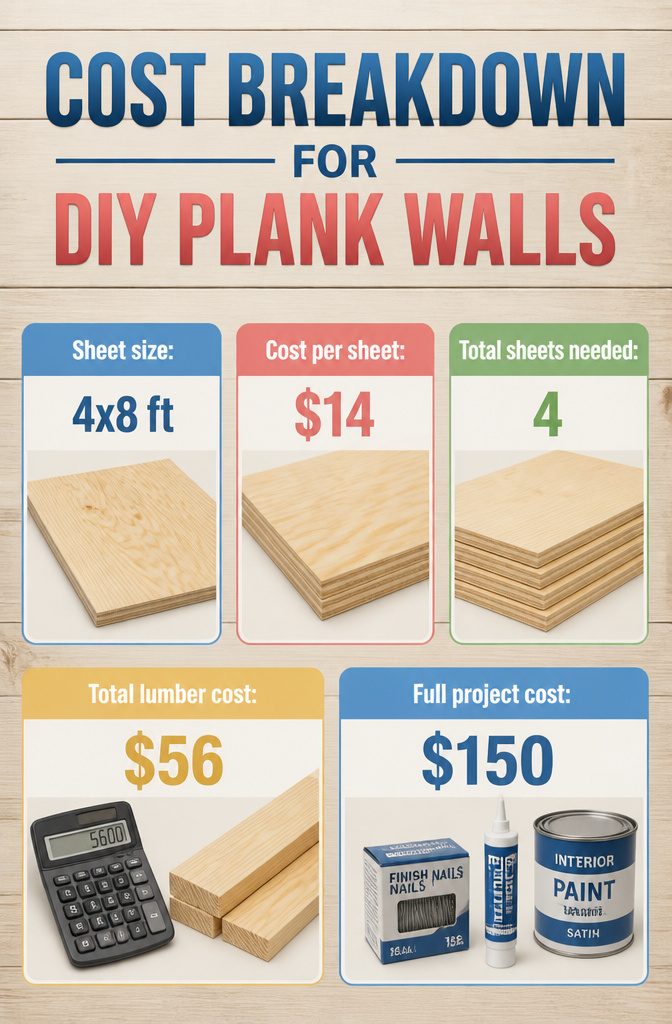
A full 4×8 sheet of ¼-inch sanded pine plywood runs about $14 at the big-box stores right now, and one sheet rips into enough six-inch planks to cover roughly eight square feet of wall once you account for blade kerf and a few miscuts.
For a typical twelve-by-eight wall, four sheets puts the lumber at $56. Add a box of finish nails, a tube of painter’s caulk, and a quart of whatever paint matches your trim, and the whole job lands around $150.
Tongue-and-groove shiplap in the same space would push past $400 before you touched a brush, so the plywood route keeps real money in your pocket for about six extra hours at the table saw.
Horizontal, Vertical, and Herringbone Layouts
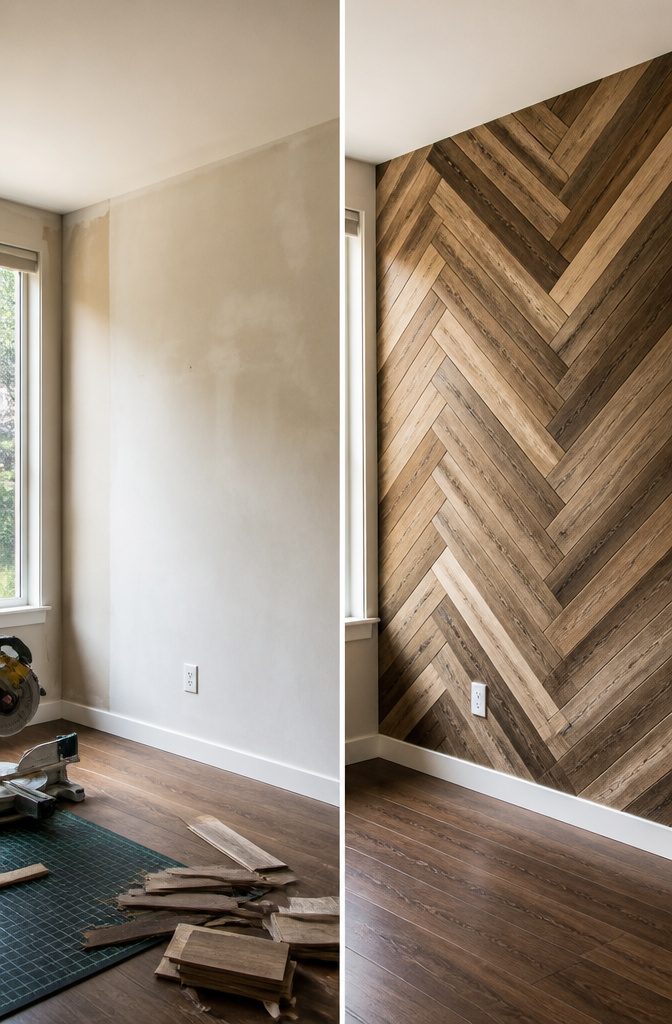
Horizontal planks read the widest, so they suit a long wall you want to bring down to human scale.
In my own living room, running boards left to right made the ceiling feel lower and the whole space cozier, which was the point.
Vertical lines do the opposite: they draw the eye up and work better in tight spots where you want height, not width.
A friend used vertical boards behind her sofa table to make her eight-foot ceiling feel less squat, and it worked.
The herringbone pattern sits at forty-five degrees and reads as something intentional rather than thrown up. It costs more in material because angled cuts waste wood at every end.
One source puts the extra waste plainly: order a little extra material. That pattern also takes longer to lay out, so it is not a Saturday project unless you have handled a miter saw before.
A geometric layout like herringbone shifts the wall from rustic background to focal point, which is great when the wall is what you want people to notice and less great when you need it to sit behind art or a television.
Choose the direction before you touch a single board. The aesthetic choice is not reversible without starting over.
Nailing Versus Peel and Stick
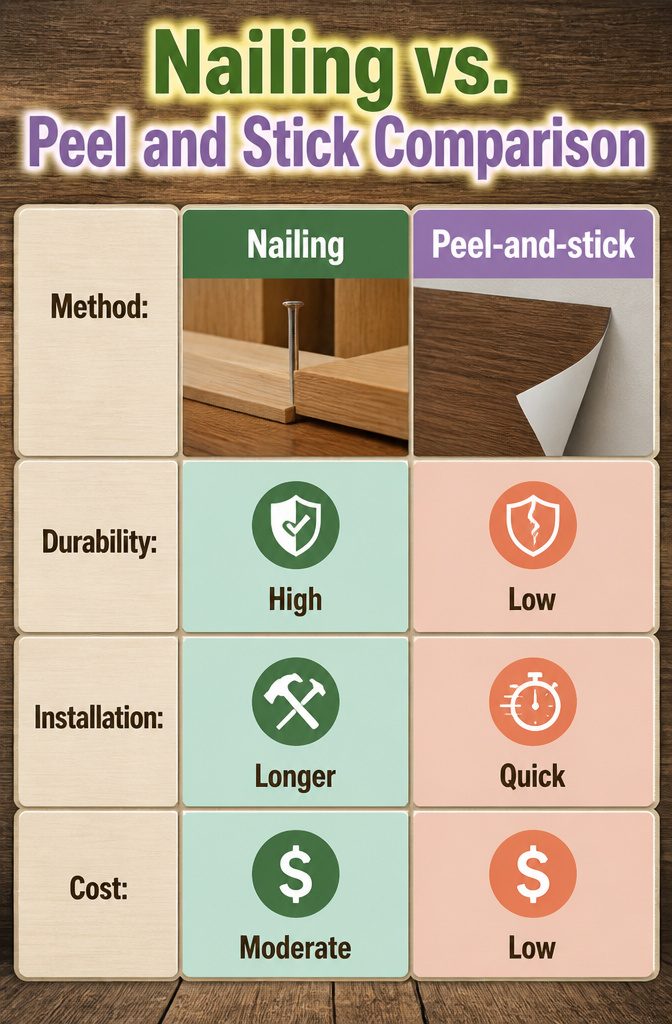
Traditional nailing is the method that stays put once the planks are up.
A finish nail through the tongue of each board into a stud gives the wall the strength to survive furniture being dragged against it, kids leaning on it, or the occasional vacuum bump that any real wall takes.
The nails hide in the groove of the next plank, so the face stays clean.
Peel-and-stick vinyl planks trade that durability for speed. The adhesive backing presses onto a smooth wall in minutes, no compressor or stud finder required.
The finish reads as wood from across a room, and a rental bathroom or a tucked-away laundry nook can look finished by Sunday afternoon.
Peel and stick is less durable and best for low-impact spaces. The adhesive softens with humidity shifts, and the corners lift if anything scrapes them.
A hallway or behind a headboard sees too much contact; a powder room or the side of a closet that never gets brushed against does not.
For my own wall, the time saved with peel and stick tempted me until I pictured the spot above our shoe bench. Knees, bags, elbows hitting that surface every morning meant nails, not stickers.
Painting Versus Staining
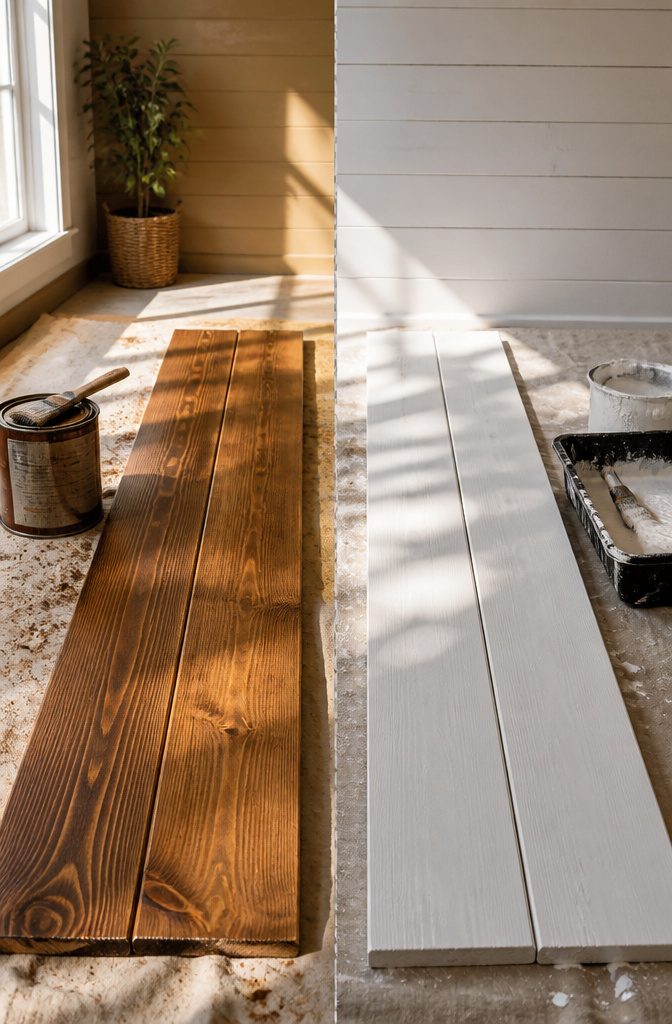
Paint gives you a flat, uniform face if you need the room to read clean.
I used Simply White on my first plank wall because the adjoining kitchen cabinets were already that color and the visual line had to stay continuous.
Stain does something paint cannot: it lets the grain telegraph through, so the wall still reads as wood rather than as boards that happen to be brown.
No single paint type wins for this application, so testing your actual plank under your actual light matters more than chasing a brand recommendation.
A pre-stain conditioner helps if you go the stain route, especially on softer woods that blotch. Wipe it on, wait the labeled time, then stain.
Let it sit roughly five minutes before wiping off the excess. Dark walnut reads richer than the raw pine most of us buy, though the color shifts under warm bulbs versus daylight.
Stain rewards close looking; paint rewards standing back. That choice alone shapes whether the wall functions as texture or as backdrop.
Frequently Asked Questions
How much does it cost to plank a wall?
A DIY plank wall runs about $150 for a typical 12 by 8 foot space using ¼-inch plywood ripped into 6-inch planks. Four sheets at around $14 each puts lumber at roughly $56, plus nails, caulk, and paint.
Tongue-and-groove shiplap for the same wall would cost over $400.
What materials are best for a plank wall?
Plywood offers the most control for your dollar and takes paint or stain well, though you will need to rip it into planks yourself or pay a store to do it.
MDF looks smooth but swells when wet even after painting. Pre-cut planks like PureBond save ripping time but cost more, while vinyl peel-and-stick works for renters or tile surfaces but lacks long-term durability.
How do I cut around outlets and switches?
Turn off power at the breaker first, then remove the outlet cover and loosen the outlet so it sits slightly forward.
Mark the plank with the outlet’s exact position, cut slightly inside the line with a jigsaw, and slide the plank behind the outlet ears.
The original screws will be too short, so replace them with longer ones from any hardware store.
Do I need to paint the wall before planking?
Yes, roll the wall color on first and let it dry overnight. Gaps happen around knots or where boards cup slightly, and whatever color sits behind the planks will show through.
A dark wall behind light wood reads as shadow you cannot sand away.
What tools do I need to install a plank wall?
A nail gun with 1¼-inch brad nails, a 24-inch or 48-inch level, a stud finder, and a saw for ripping and crosscutting planks form the core kit.
Add a jigsaw for outlet notches, a palm sander with 220-grit paper for edges, wood filler with a putty knife for nail holes, and a caulk gun for seams and corners.
What is a cheap way to make a slat wall?
Rip ¼-inch sanded pine plywood into 6-inch planks using a table saw or a home improvement store cutting desk, which often charges only a few dollars total.
One 4 by 8 sheet yields eight planks for about $14, and the thin stock sits nearly flush against existing baseboards so you skip trim removal.
How do you make a planked wall?
Measure your wall and order plywood sheets ripped into planks, sand the cut edges smooth, mark stud locations every 16 inches, and attach the first plank dead level at top or bottom.
Continue upward with spacers between planks, stagger seams by at least twelve inches, cut around outlets with a jigsaw, then fill nail holes and paint or stain.
What are the cons of plank walls?
Gaps between boards can reveal the wall behind if you skip prep painting. Plywood edges splinter and need sanding.
Outlets require careful fitting and longer screws. MDF swells irreversibly if moisture hits it.
Angled patterns like herringbone waste material and take far longer than a straight layout.
Can wood plank walls be used instead of drywall?
Planks install over existing drywall rather than replacing it, since studs alone would leave insulation and fire-blocking gaps exposed.
The ¼-inch plywood used in most DIY plank walls is too thin to serve as the sole wall surface; it needs the drywall behind it for structure and code compliance.