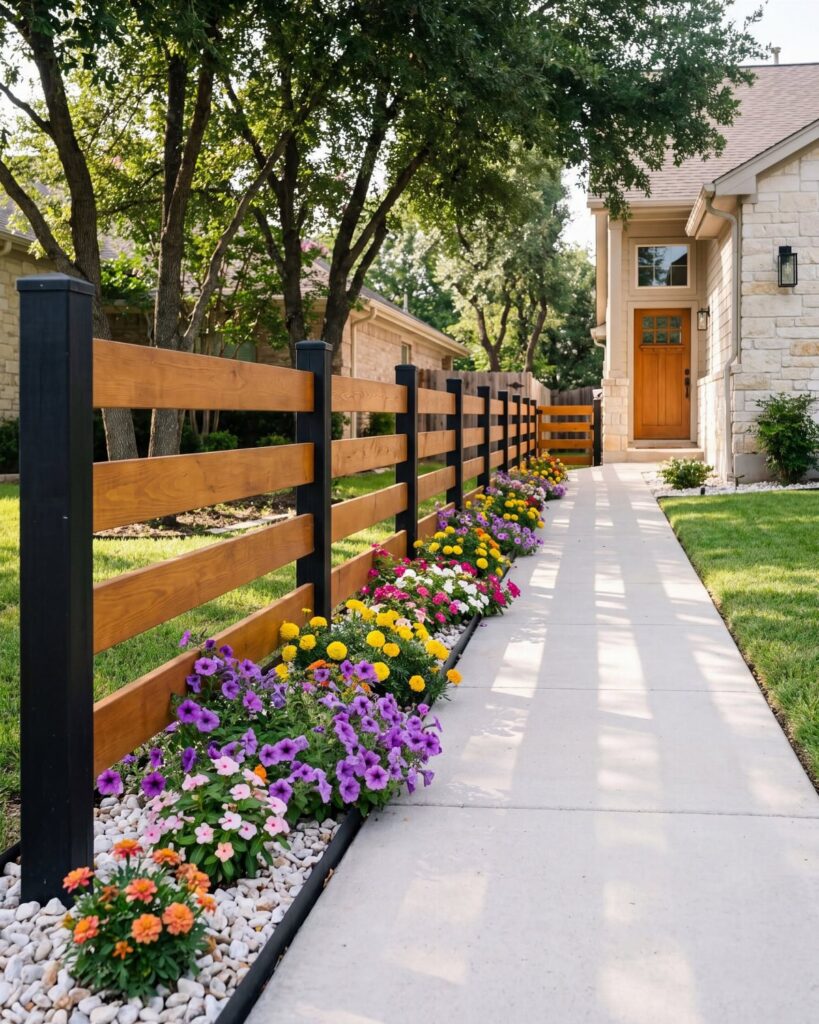
A split-rail cedar fence costs less than lumber-heavy styles like board-on-board, and the right choice depends on whether you need to see through it, past it, or nothing at all.
The gap in a picket fence reads as deliberate; the solid privacy wall blocks sightlines and dulls traffic noise.
[link-whisper-related-posts]1. Picket Fence
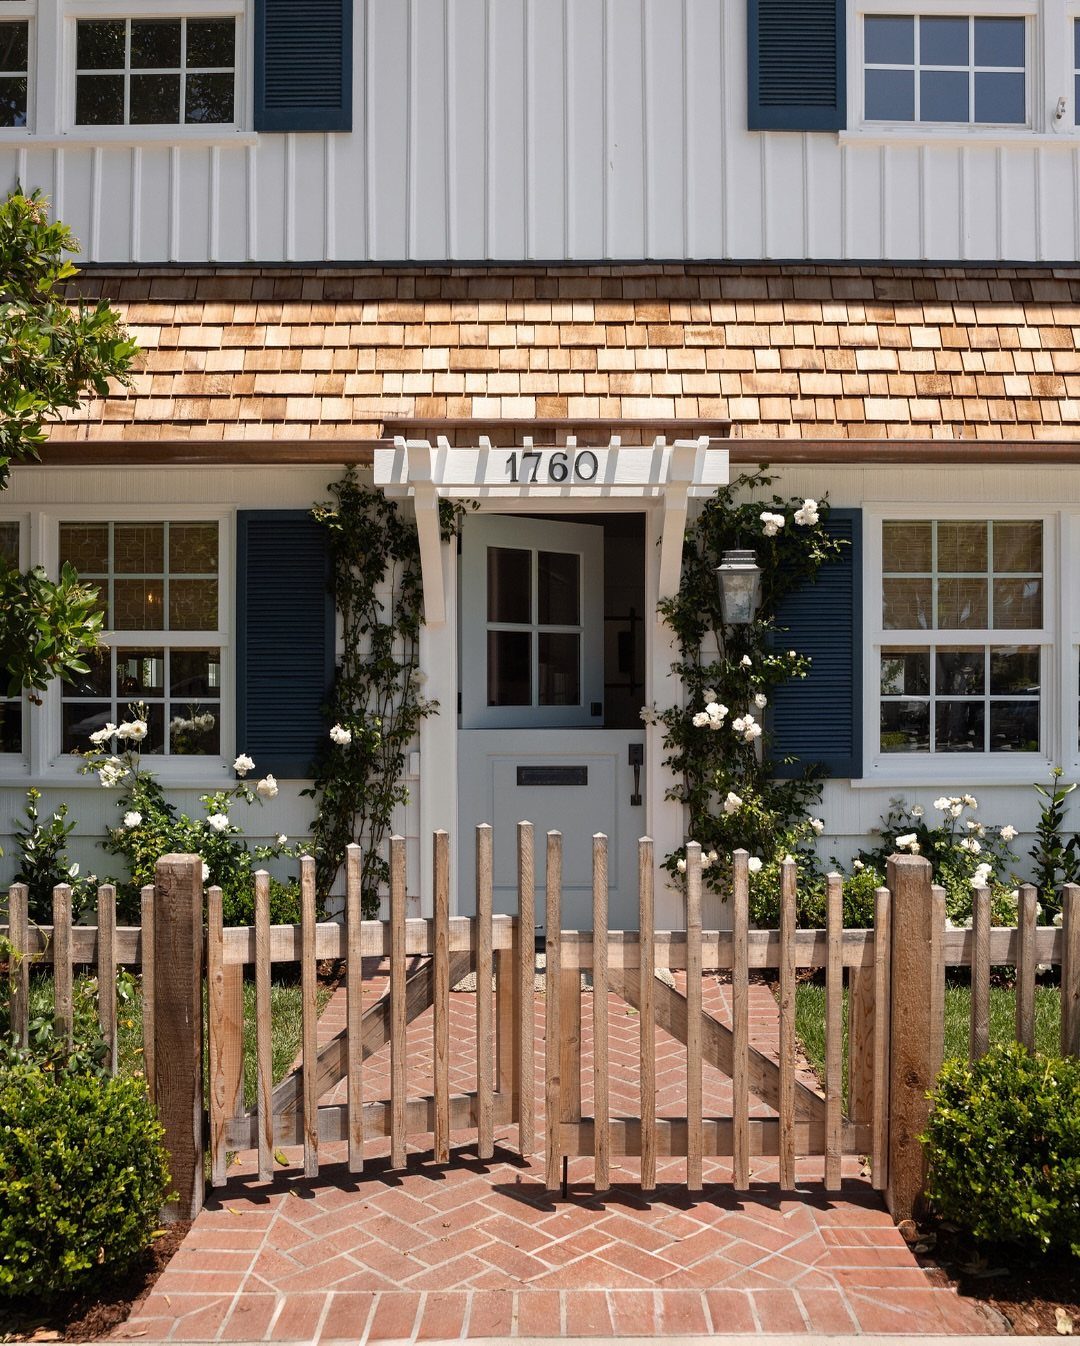
Flat pickets with a dog-eared, chevron, or flat-top cut give a picket fence its particular character, and the spacing between them is yours to set.
I like the look best when the gap is narrow enough to read as deliberate but wide enough that light passes through; 3 inches is a common starting place.
Concrete footings keep the posts square through freeze cycles, which matters more than most first-timers expect.
Paint it white for the cottage effect, or leave cedar to gray. The "good" side faces the street in most towns with fence ordinances; the back shows the rails, which I find honest rather than ugly.
2. Privacy Fence (Solid)
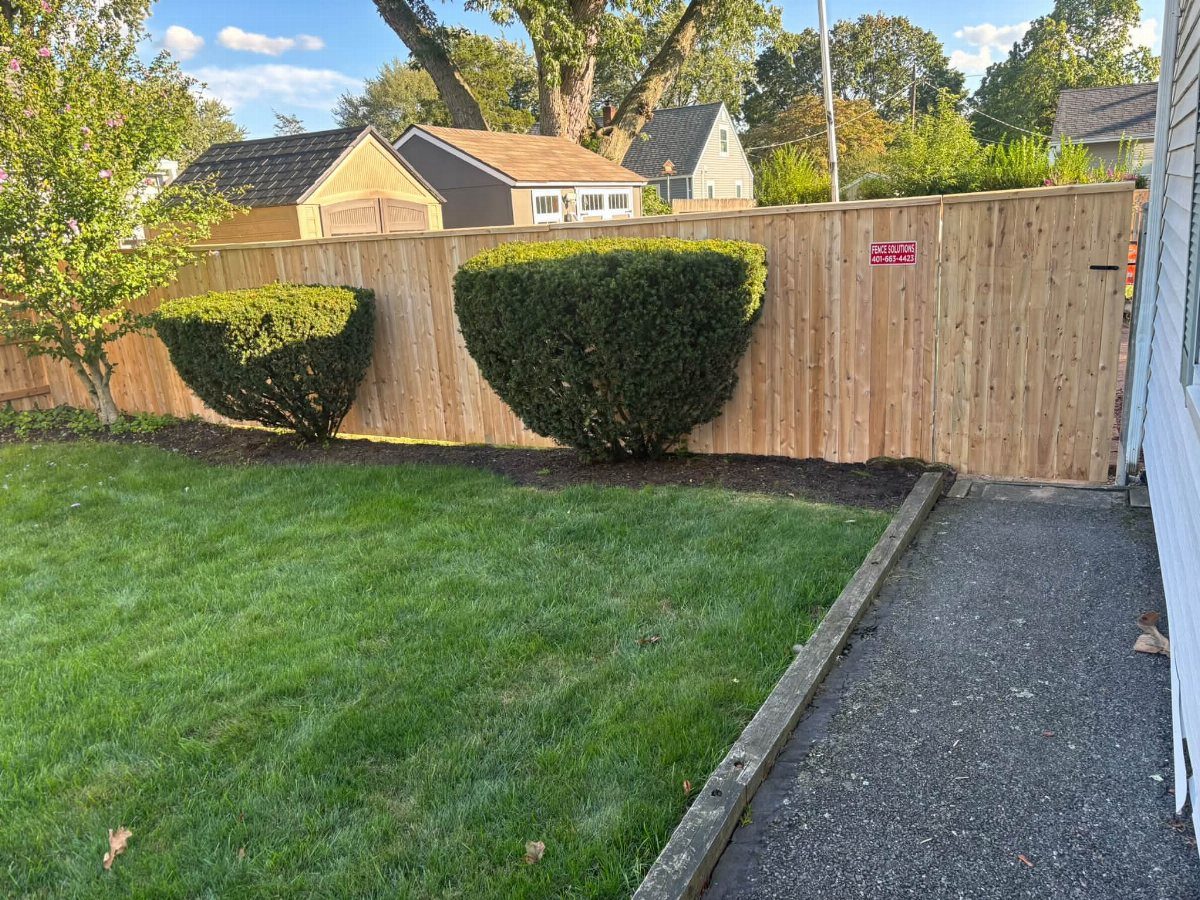
Tight vertical boards with no gaps between them block sightlines and dull traffic noise better than any other wood option. Pressure-treated posts set in concrete carry the weight; steel posts cost more but last longer in wet ground.
Heights run 5 or 6 feet in most places, though 8 feet is possible where local code allows the variance.
The finish is where I would spend money after the structure is right. Good outdoor paint with real adhesion keeps the surface from blistering the second summer, which is when cheap coatings give up.
Cedar or pressure-treated pine keeps the initial cost down; PVC mimics the look at a higher price if you want zero maintenance.
3. Board-on-Board Fence
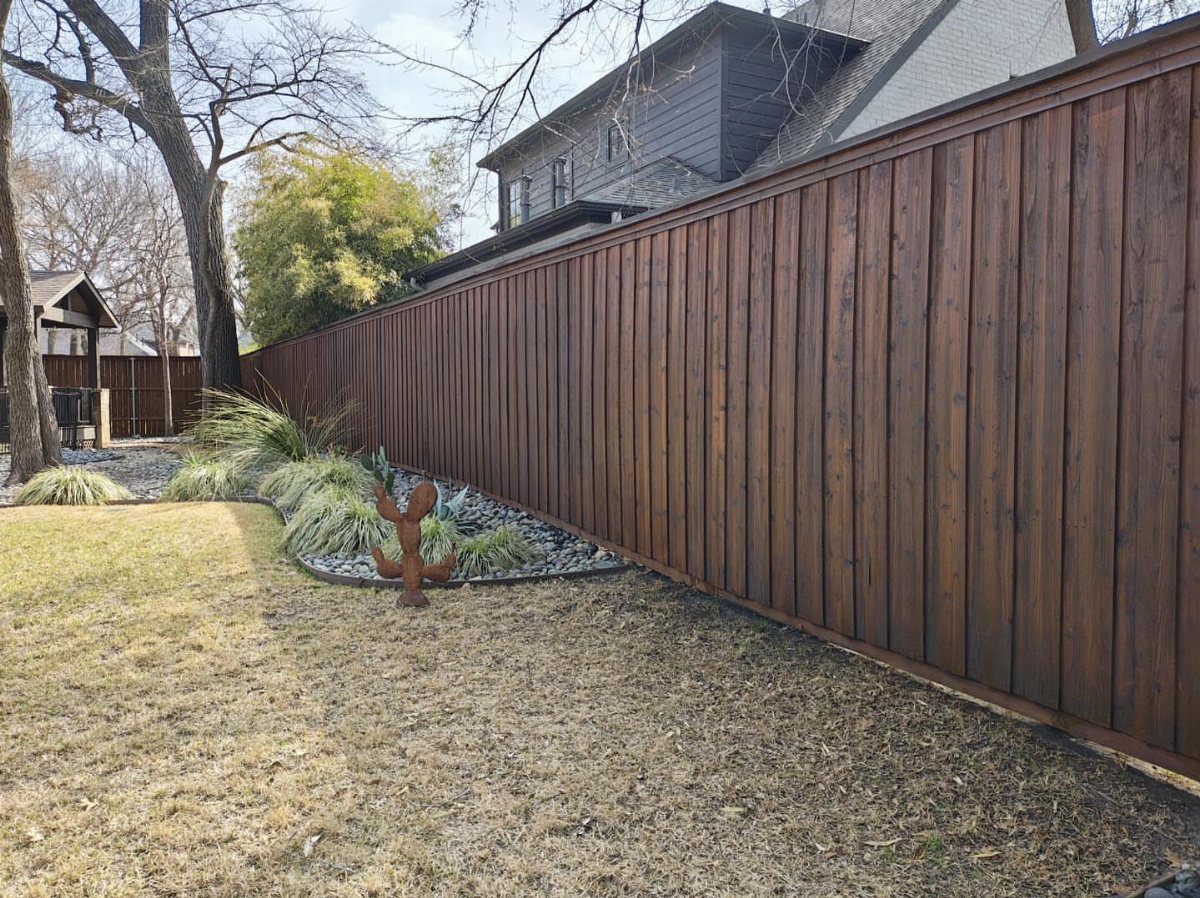
Board-on-board construction hides the rails entirely by overlapping vertical pickets front and back, so the fence reads the same from either side. That symmetry matters on property lines where you would rather not negotiate who gets the pretty face.
The overlap also closes the gaps that open as boards shrink in dry weather, which in Kansas and Missouri sun can mean a solid look for years longer than side-by-side designs.
Pressure-treated or steel posts with concrete footings carry the extra weight.
The cost runs above a basic privacy fence because of the doubled material, but I would pay it for any fence shared with a neighbor or visible from both yards.
4. Lattice Fence
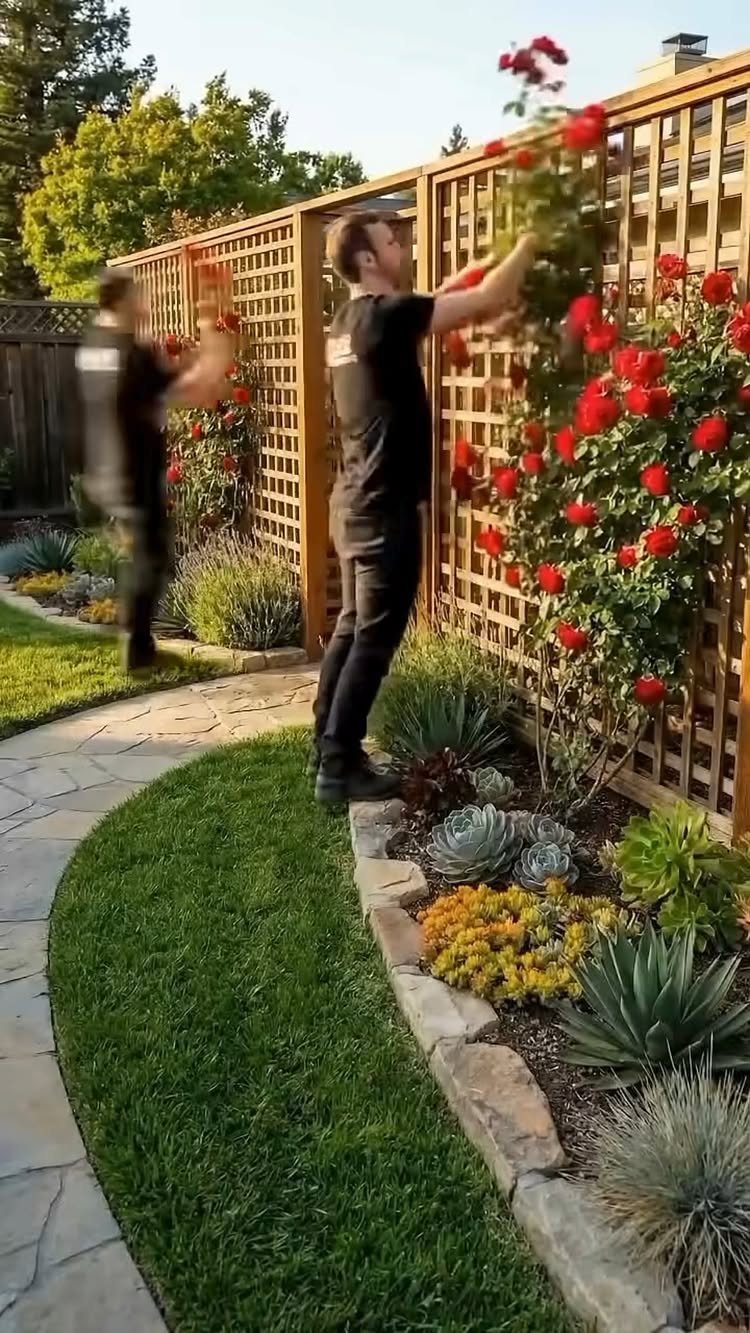
A lattice panel is crisscrossed strips set diagonal, light enough to let air through but structured enough for roses or clematis to climb.
I have seen it work as a full fence for a garden room, and more often as a narrow topper on a solid privacy wall, where it adds height without the mass of full boards.
Concrete footings and pressure-treated posts handle the structure; the lattice itself is thin and needs the frame to stay square.
In humid summers the airflow through the gaps keeps the space behind it cooler than a solid wall, which is worth something if you are sitting nearby.
Plant something fragrant at the base and the fence becomes a trellis by June.
5. Rustic Split-Rail Fence
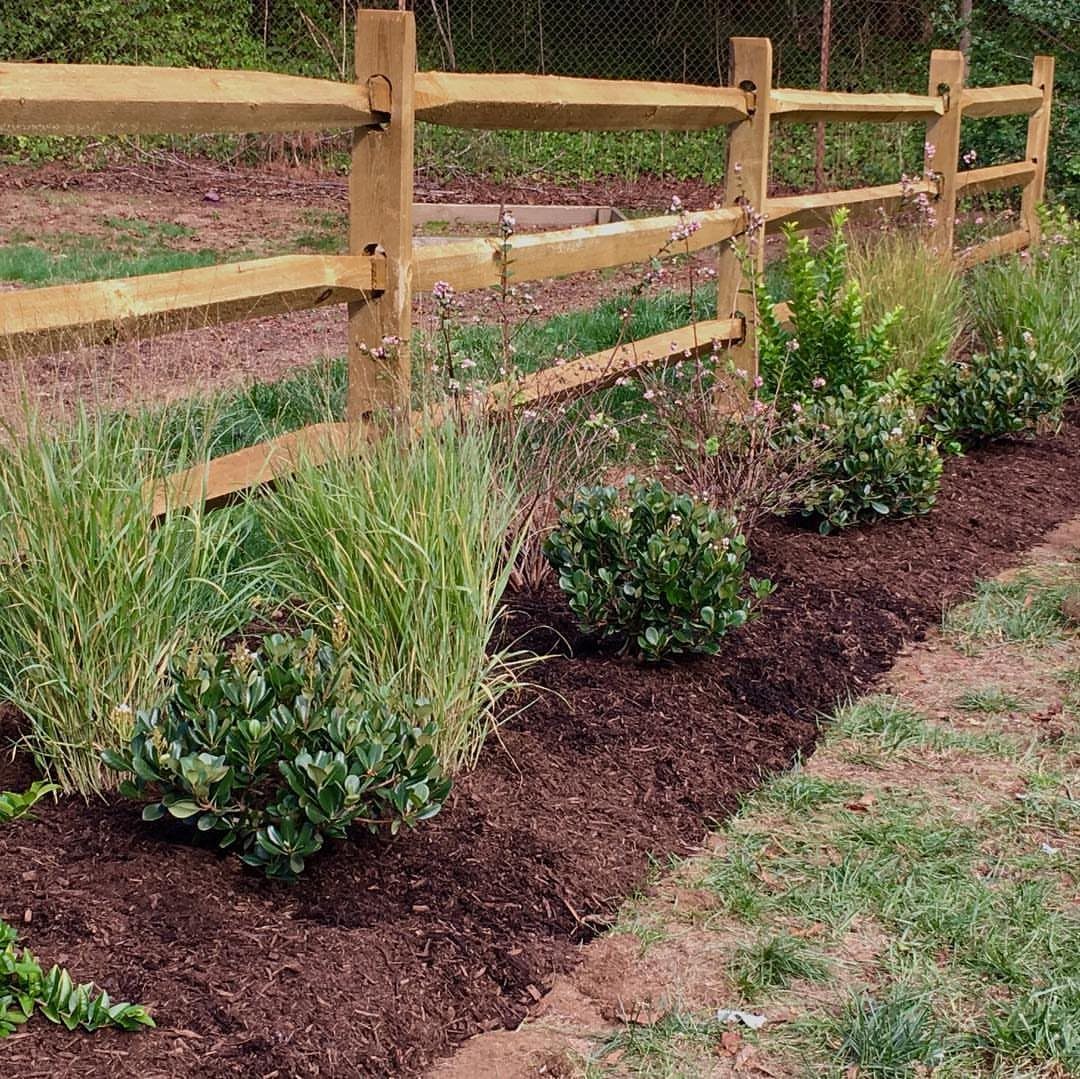
Rough cedar posts with 2 or 3 rails split from whole logs carry the split-rail look, spaced wide enough to see through easily.
The standard heights are 3, 4, or 5 feet; at 4 feet 7 inches the rail sits at a height that stops most dogs without blocking the view of a field or large yard.
It is the cheapest wood fence to build because the materials are minimal and the posts need no concrete if you set them deep in well-drained ground.
For pets, I would add welded wire mesh to the back side; the open appearance stays, but the escape routes close. Rural or suburban with acreage, not for city lots where privacy matters.
6. Horizontal Fence
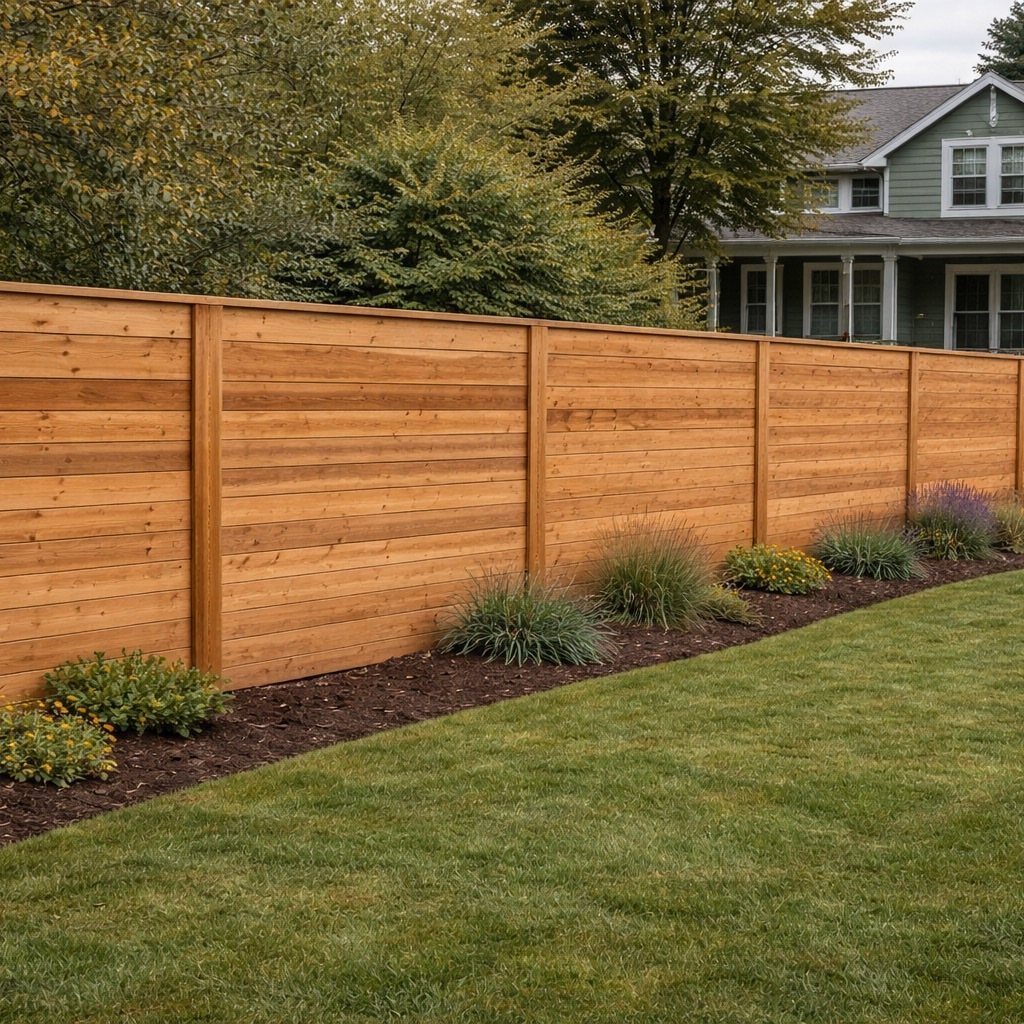
Horizontal slats read modern because the lines run the way the eye travels along a yard, not up and down like traditional fencing.
Cedar slats with streak-free fasteners keep the face clean; the fasteners matter more here than on vertical boards because every one is visible. Concrete footings are non-negotiable, as the horizontal run wants to sag without rigid support.
This design fails on slopes. The slats run level, which means stepped construction or a lot of custom cutting on uneven ground; I would check the yard with a long level before committing.
Semi-privacy with gaps or full privacy with touching boards are both possible. A nail gun and metal brackets on existing posts, as one builder did for a pool deck, can skip the post-hole stage entirely where height allows.
7. Shadowbox Fence
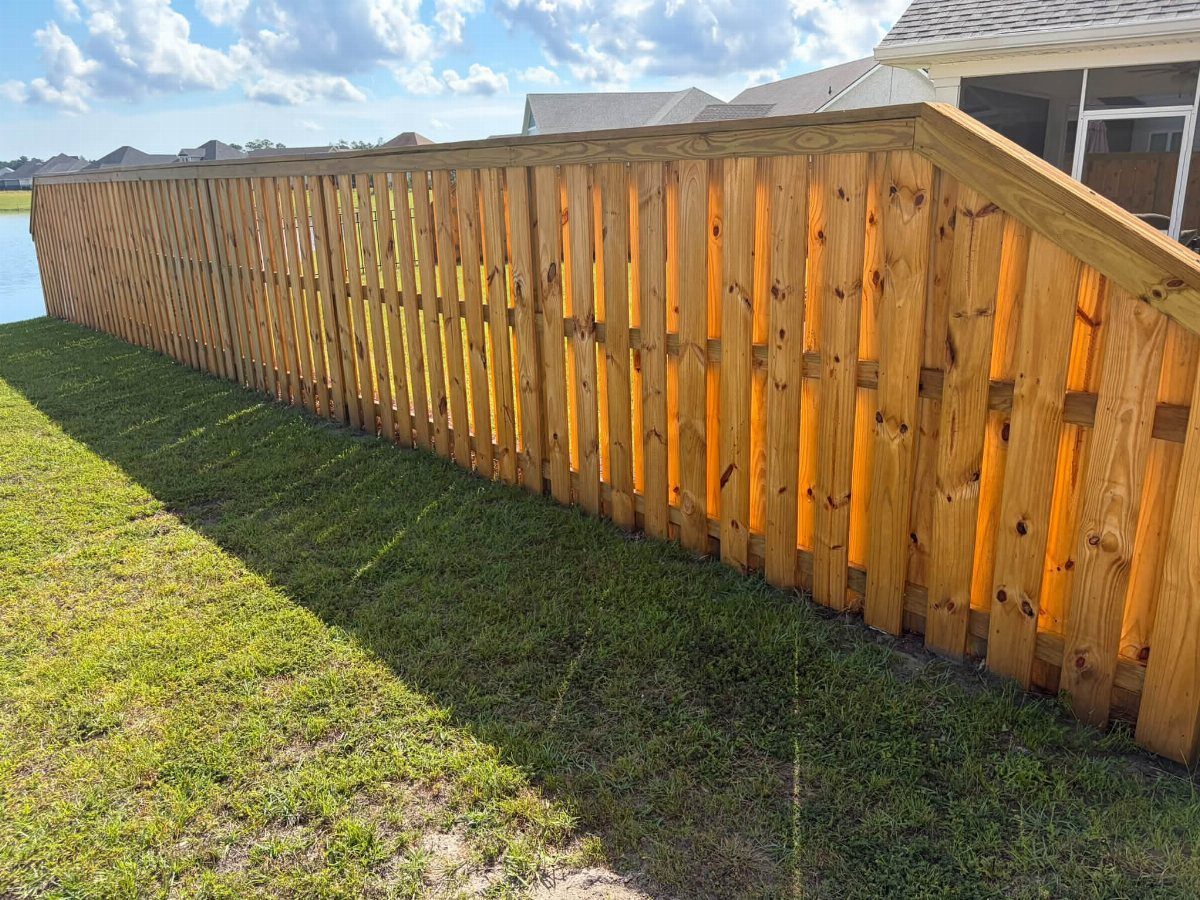
A shadowbox fence looks finished from either side because the pickets alternate along the rails, one board facing your yard and the next facing the neighbor’s.
That spacing lets wind pass through instead of pushing against a solid wall, which matters in gusty areas where a privacy fence can rock posts loose over a season.
You get semi-privacy: someone walking by catches movement and light through the gaps, but not a clear view of your patio. The layered boards still read as a full fence from a distance.
If you share the property line, this saves the awkward conversation about who faces the "good" side. Both of you see the same staggered pattern.
Dogs benefit too. The gaps sit high enough that a curious dog can watch the sidewalk without squeezing through or getting their head stuck.
8. Basket Weave Fence
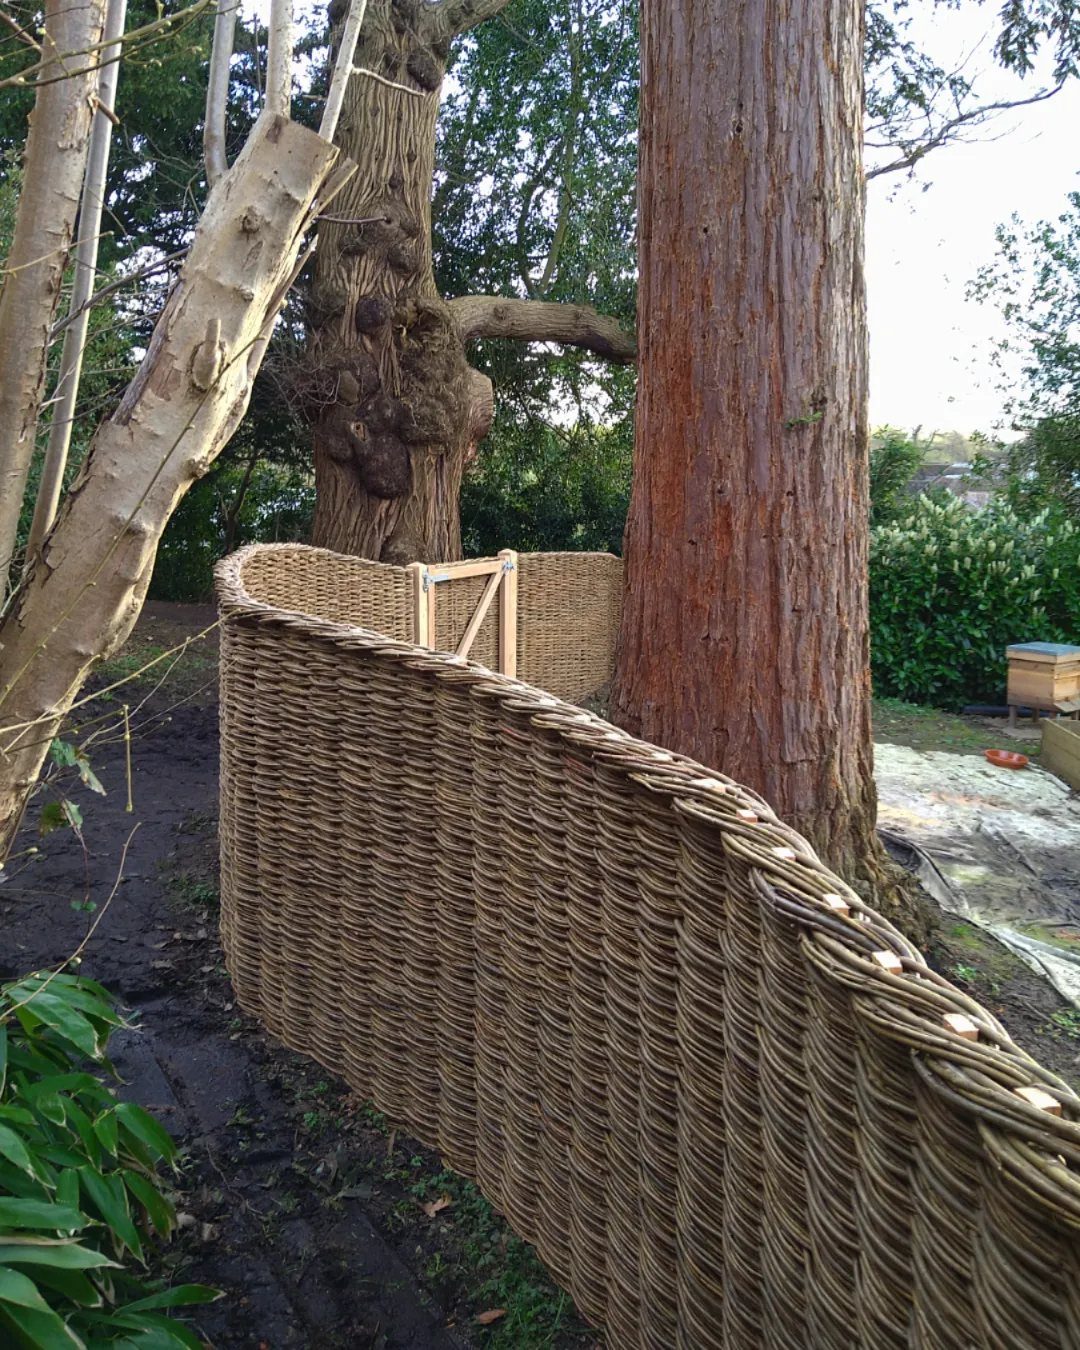
Basket weave fencing uses thin strips woven over and under horizontal supports, the same motion as a wicker chair but scaled to a yard boundary.
A double weave, two strands crossing between each post, softens the whole line and lets air move through while still breaking a direct sightline.
Natural willow or cedar strips weather to a silver-gray in about 2 years if left unfinished. That rustic finish suits cottage gardens or any space where a crisp painted fence would look out of place.
Maintenance runs the same as standard cedar: a clear sealant every few years if you want to keep the warm tone, or nothing if you prefer the aged look.
The weaving itself adds no extra upkeep beyond checking that the horizontal rails stay tight; a loose rail lets the weave sag.
This style curves easily around existing trees or garden beds without the gaps that plague angled panel fences.
9. Good Neighbor Fence
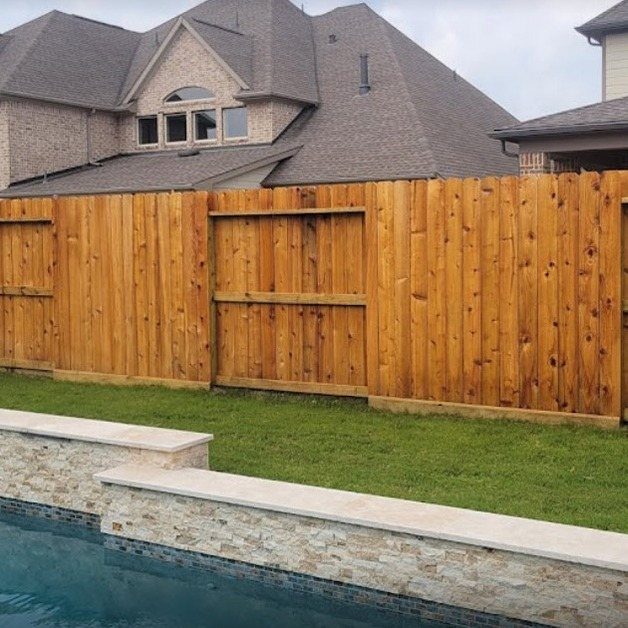
A good neighbor fence earns its name by looking identical from both sides, usually through overlapping pickets that hide the posts and rails no matter which yard you stand in. The neighbor sees finished boards, not the structural backside.
Board-on-board construction is the common method: one layer of vertical pickets covers the gaps of the layer behind it, with each side presenting the same solid face.
That overlap also blocks more light than a single-thickness privacy fence, which matters if your bedroom window sits close to the property line.
This design costs more in lumber than a standard side-by-side fence because you’re essentially building two faces.
What you get back is peace with the person who shares your boundary, and no future negotiation about who pays when a post rots.
Custom options run from cap rails and post tops to stain colors that match both houses. If your HOA or city code requires finished sides facing out, this style satisfies without argument.
10. Vertical Slat Fence
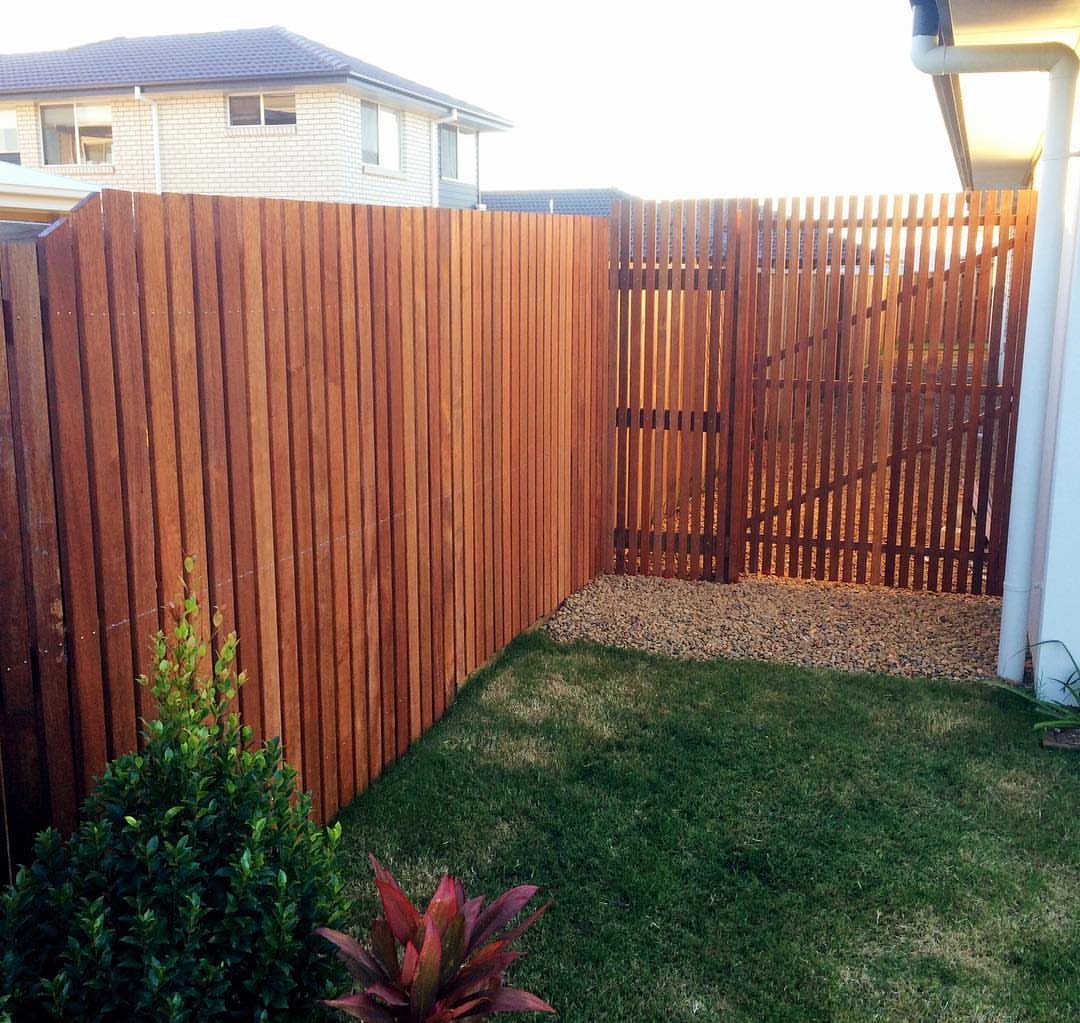
Vertical slat fencing keeps the familiar up-and-down boards but spaces them deliberately and hides the rails on the back side, usually the neighbor’s. What you see from your patio is clean lines and shadow gaps, nothing else.
The spacing is the decision that changes everything. Tighter slats give near-total privacy; wider gaps turn the fence into a screen that filters light and view without blocking breeze.
Merbau hardwood holds up to ground contact better than standard pine if your climate runs wet.
The horizontal rails sit on the far side, so your view stays uninterrupted. That means the finished face is fixed; you cannot flip this fence later if relations with the neighbor shift.
A matching gate in the same slat rhythm keeps the look consistent across the whole yard. Check your local setback rules before building; some towns require the structural side inward, which would reverse the whole effect.
11. Steel Hog Wire Panels Framed in Cedar
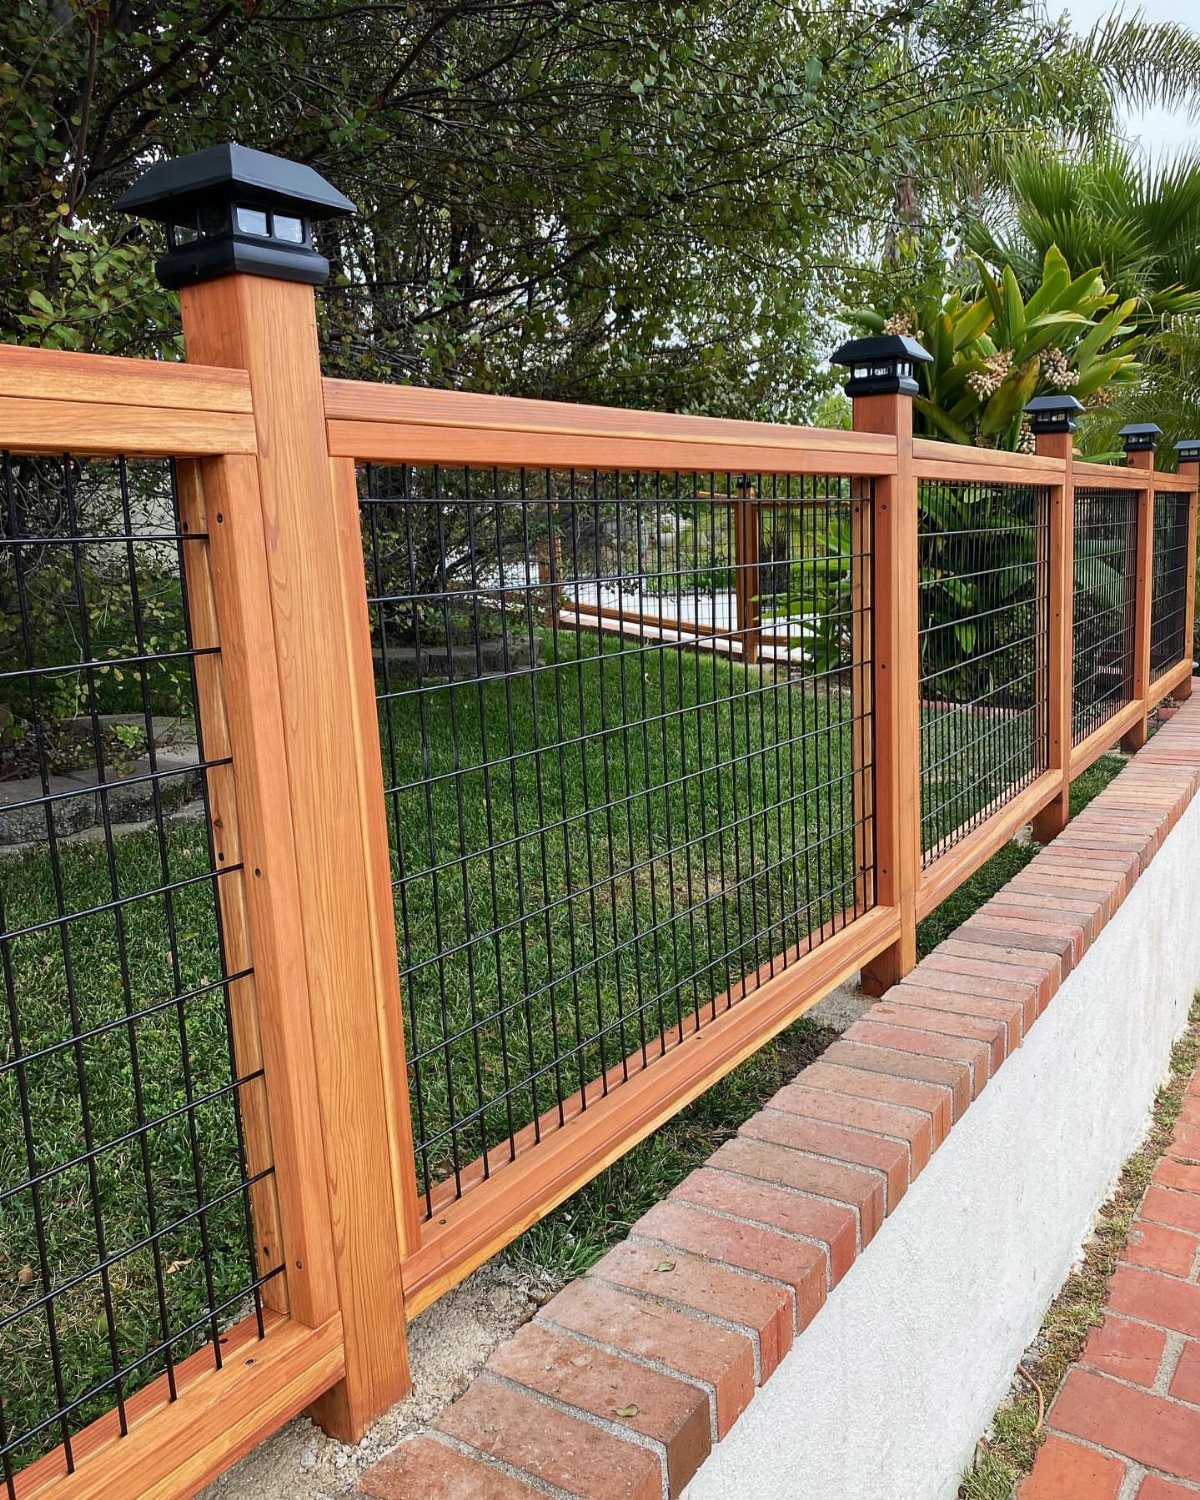
Steel hog wire framed in cedar gives you a grid you can see through, sturdy enough to stop a dog but open enough that your garden does not feel walled off.
The cedar frame provides the warmth and weather resistance; the black wire does the actual containing.
Post cap solar lights are an add-on that turns the fence into evening landscape lighting without running conduit.
The wire panels themselves come in fixed sizes, so your post spacing has to match or you’ll be cutting steel in the field.
This style suits front yards where a solid fence would block sightlines and devalue curb appeal, or vegetable gardens where you want air circulation and pollinator access. It does not suit pool enclosures or anywhere code requires a privacy barrier.
The wire can rust if the coating chips; inspect where the frame grips it. Otherwise maintenance is cedar-standard: seal or let silver, your choice.
12. Picture Frame Fence
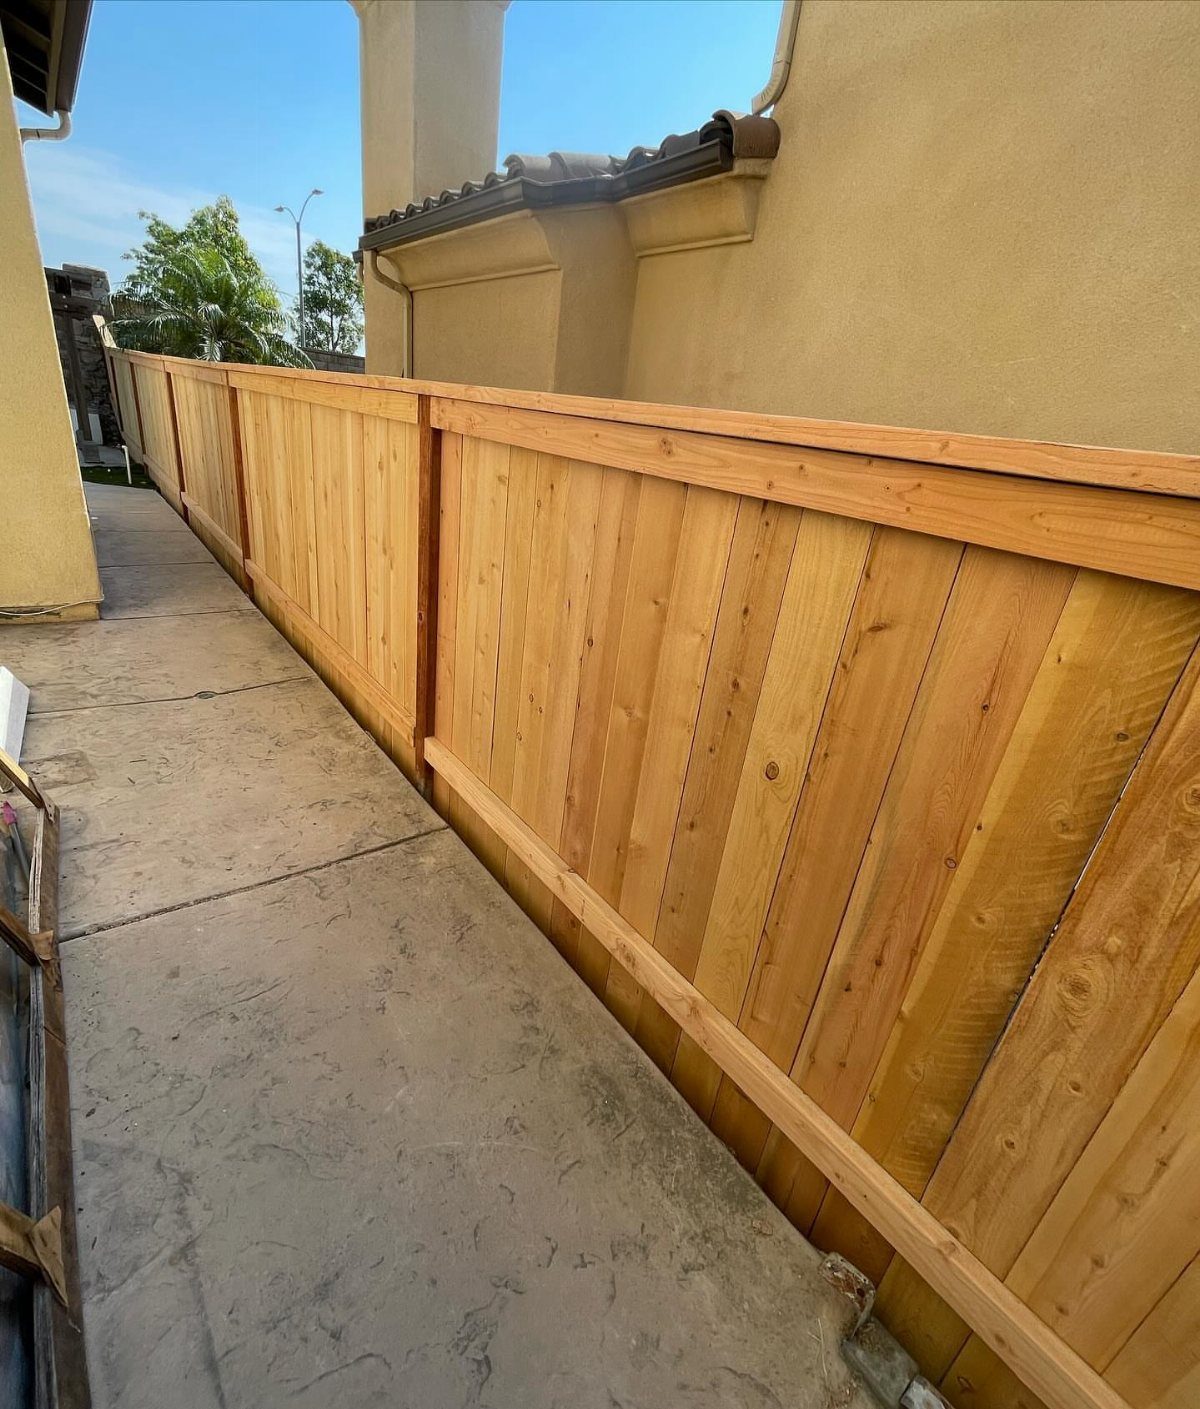
Picture frame fencing wraps each section in thick horizontal rails top and bottom, so the vertical boards read as panels within a grid rather than endless pickets.
That trim adds material cost and labor, but the result looks built to stay.
Concrete footings matter more here than on lighter styles. The frame’s extra weight plus any cap rail you add concentrates load on the posts; a post set in packed dirt will lean before long.
The structured look suits formal gardens, modern houses, or any property where the fence is meant to read as architecture rather than afterthought.
Stain or paint both frame and field the same color to emphasize the geometry, or contrast them to make the grid pop.
Cap rails protect the end grain of the vertical boards from water, which extends the life of the whole panel. If your budget runs tight, skip the cap and accept more frequent board replacements down the line.
13. Painted Wood Fence
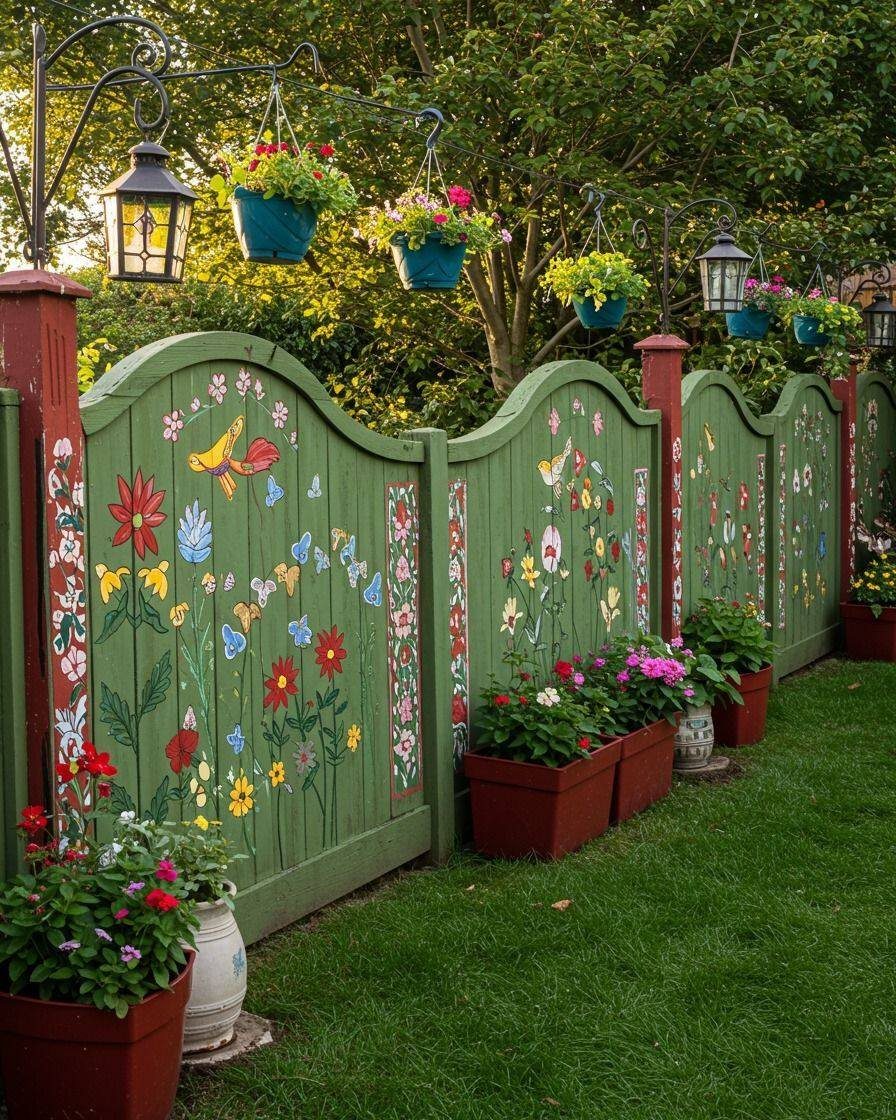
A painted fence turns the yard into something you actually chose instead of something you accepted. Green boards with hand-painted flowers, birds, and butterflies give a garden fence the look of folk art that grew there naturally.
Quality outdoor paint matters more than the color you pick.
Pressure-treated posts set in concrete give the structure something solid to hold onto, and painting the slats before you screw them on saves you from cutting in around every fastener later.
Stars glued on with outdoor adhesive sit flat and stay put through freeze and thaw.
This one suits someone who wants their fence to read as decoration first, boundary second. Paint takes more upkeep than stain: it flakes and fades where stain just weathers, so expect to touch it up every few years.
For a reader already repainting a room or a dresser every spring, that rhythm feels familiar. For someone who wants to install and forget, stained wood or a vinyl picket makes more sense.
In addition to the types of wood you can choose to build your fence, you can also paint or stain the wood for different looks and design the fence in ways that evoke all kinds of style preferences.
14. Wood Fence with Metal Accents
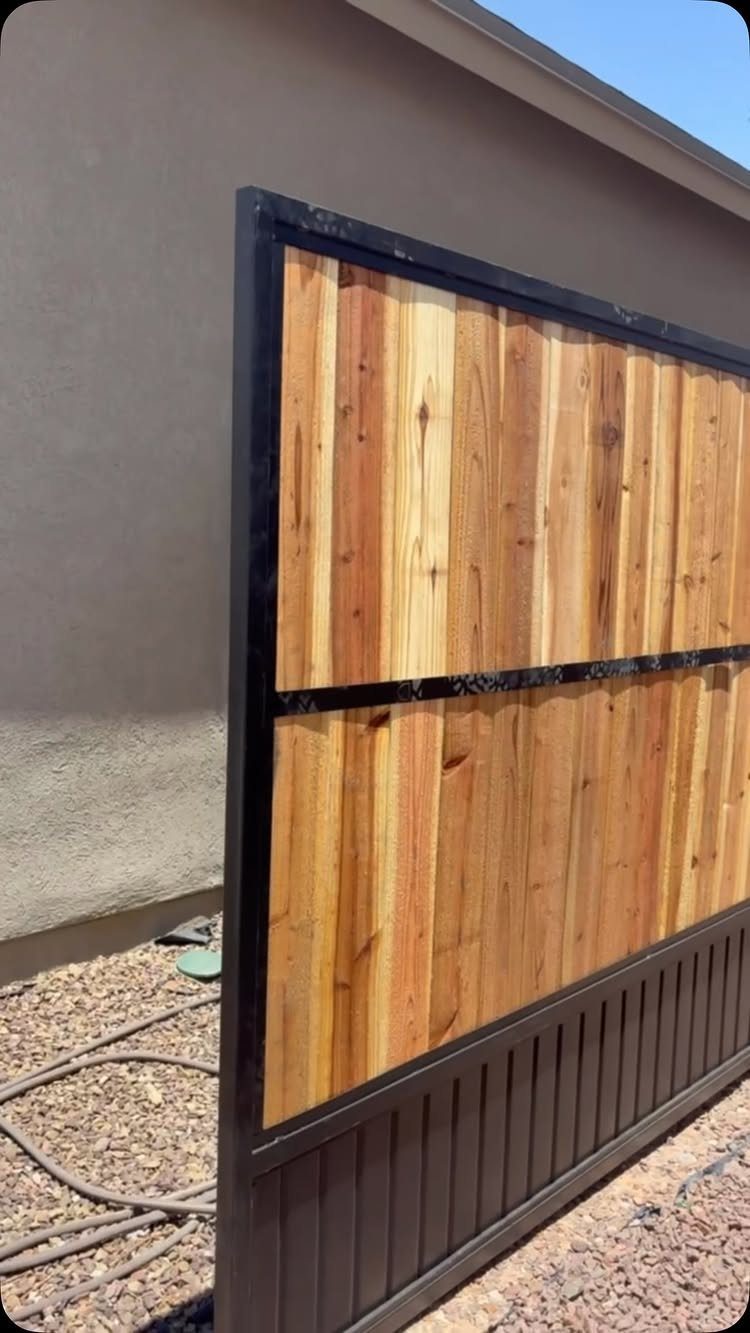
Metal and wood together split the difference between a farm gate and a city courtyard. Vertical cedar planks inside a black steel frame give clean edges where an all-wood fence goes soft and ragged over time.
The metal does more than look modern. Exposed steel posts strengthen the whole panel against wind and leaning, and the frame gives installers something square to build against.
Pickets along the top or caps on the posts add the kind of detail that metal handles well, since it won’t rot like wood trim would.
Corrugated or slatted metal at the bottom, where soil splashes up and mower string catches, lasts years longer than wood in the same spot.
I would put this one on a house with stucco or painted brick, where the black frame picks up window trim or a railing already in place.
The look turns rustic fast if the wood weathers to silver while the steel stays dark, so keep the cedar oiled or let both materials age together intentionally. Maintenance runs higher than all-wood, lower than all-metal.
15. X-Braced Fence with Wire Mesh
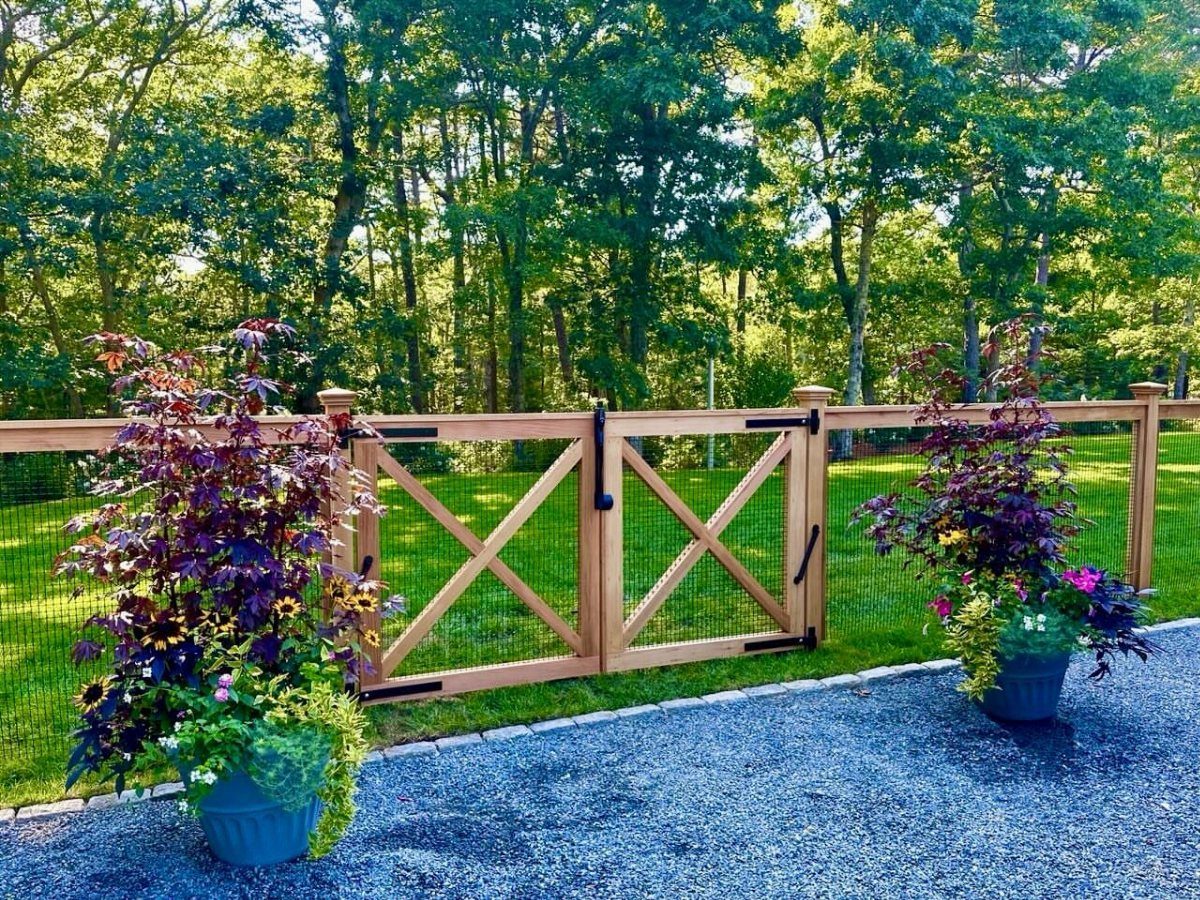
X-bracing on a gate or fence panel does the structural work of a diagonal board but reads as decoration first, engineering second.
The crossed boards stiffen the frame against sagging, and the wire mesh behind them keeps dogs in without blocking light the way a solid board would.
Western red cedar works here because it holds up in ground contact and weathers to the silvery gray people expect from ranch fencing. Tight-knot cedar costs more than fence-grade stock but leaves fewer weak points where a knot fell out.
Wire mesh comes in different weights; chain link mesh gives security for larger animals, lighter field fencing handles chickens and small dogs.
A double gate wide enough for a car, set in gravel with pots on either side, reads more as a driveway entrance than a backyard boundary.
For pastureland, 4 feet of height contains sheep and goats; for a backyard, the same height feels neighborly rather than fortress-like. I would not use this design where privacy matters, since the mesh leaves the whole lower half open to sightlines.
A board-on-board panel behind the same X-frame fixes that, and the bracing still shows at the gate.
Choosing the Right Wood Type
For a fence that still stands ten years from now, I look at cedar, redwood, or pressure-treated pine.
Cedar and redwood fight rot and bugs on their own; above ground they run 15 to 25 years, but bury the posts and you drop to 10 to 15.
Pressure-treated pine costs less and matches that durability chemically, though Roger Cook warns it can warp and crack as it dries. Spruce costs the least and gives you 8 to 12 years if the weather cooperates.
Redwood runs 20 or more years with maintenance where it is available. I would match the wood to the climate: wet ground and freeze-thaw cycles punish the wrong choice faster than the right one.
Installation Tips
Set posts at one-third of their total length in the ground, and pour concrete around them; packed dirt leans eventually. Call utility marking before you dig.
Weather-resistant fasteners matter more than most first-timers budget for; the cheap ones rust out and let boards sag. Steel posts or systems like PostMaster+ skip the rot question entirely if your ground stays wet.
I would hire out the install only if local code is complex or the line runs near utilities; most of this work is digging, leveling, and waiting for concrete to set.
Maintenance Practices
Wash the fence once a year with a hose or low-pressure washer to lift mildew and dirt. Inspect in spring for loose fasteners, boards that have shifted, and any soft spots at the base.
Tighten and replace then, not later. Every 2 to 4 years I brush on a water-repellent stain or sealer with UV blockers; the breathable kind lets moisture out instead of sealing it in.
Trim back shrubs and vines that lean on the boards, since held moisture is what starts rot. The cost of a gallon of sealant and a Saturday beats replacing a panel.
Design Considerations
Match the fence to the actual job: privacy needs solid or layered boards, boundary marking can stay open, and a front yard usually wants something you can see through.
Climate matters too; humid summers punish wood that cannot breathe, and wind loads will rock a solid panel unless the posts are deep and the concrete cured.
I would walk the property line with a long level before choosing a horizontal design, since that style fails on slope without stepped construction or custom cutting.
Frequently Asked Questions
How much would a 100 ft wood fence cost?
Split-rail fencing keeps the material list short and skips concrete in well-drained ground, while board-on-board or good-neighbor designs stack lumber on both sides of the rails and run the bill up fast.
For a rough estimate, pressure-treated pine keeps initial costs down while cedar or redwood raises them; add the price of concrete footings for any style except split-rail.
A local lumberyard quote on posts, rails, and pickets for your chosen style will get you closer than national averages.
Is it cheaper to build your own wood fence?
It can be, if you already own the tools and the yard is fairly flat.
For a privacy or horizontal fence, the savings shrink once you rent an auger, buy fasteners rated for outdoor use, and factor in the weekends spent digging and leveling.
A professional brings experience with local code on post depth and property-line setbacks, which first-timers often learn about after the holes are already dug.
How far apart should posts be for a wood fence?
Six to eight feet apart is the standard spacing, with the exact distance depending on fence height and design. Taller fences and heavier styles like picture frame or board-on-board need posts closer together to carry the load without sagging.
For gate posts or any opening that bears stress, set those posts in concrete even if the rest of the fence does not require it.
What are some new fence design trends?
Horizontal slats give a cleaner, more modern line than traditional vertical boards; steel hog wire framed in cedar adds an open, industrial feel; and metal accents mixed with cedar planks bridge warm and cool textures.
Scalloped or decorative tops turn up in current work too, though these read more as variations on standard picket or privacy construction than as their own category.
Painted fences with folk-art detail and basket weave in natural willow suit readers who want the fence itself to be the garden feature.
What are the best wood fence styles?
The best style depends on what you need the fence to do. For a shared property line, board-on-board, shadowbox, or good neighbor fences look finished from either side.
For front yards or open gardens, picket, lattice, or hog wire panels keep sightlines and air moving. Split-rail is the cheapest and most open, suited to acreage rather than city lots.
How do I maintain my wood fence?
Each spring I walk the fence line and tap boards to check for looseness, look for nails or screws working their way back out, and poke along the base of posts where rot and insects tend to start first.
I wash off dirt and mildew with a hose or a low-pressure washer, then wait until the wood reads dry to the touch before putting anything on it.
Keep plants and soil line trimmed back from the boards so moisture does not sit against the wood.