These ideas run from a single Saturday with 1×3 primed MDF to a hardwired electrical job, so the deciding factor is how much wall you are willing to open and how permanent you need the result to be.
The cheapest option starts with a borrowed brad nailer and a miter box; the most expensive asks for brass picture lights at a noticeable cost per fixture plus romex work.
[link-whisper-related-posts]1. Picture Frame Molding
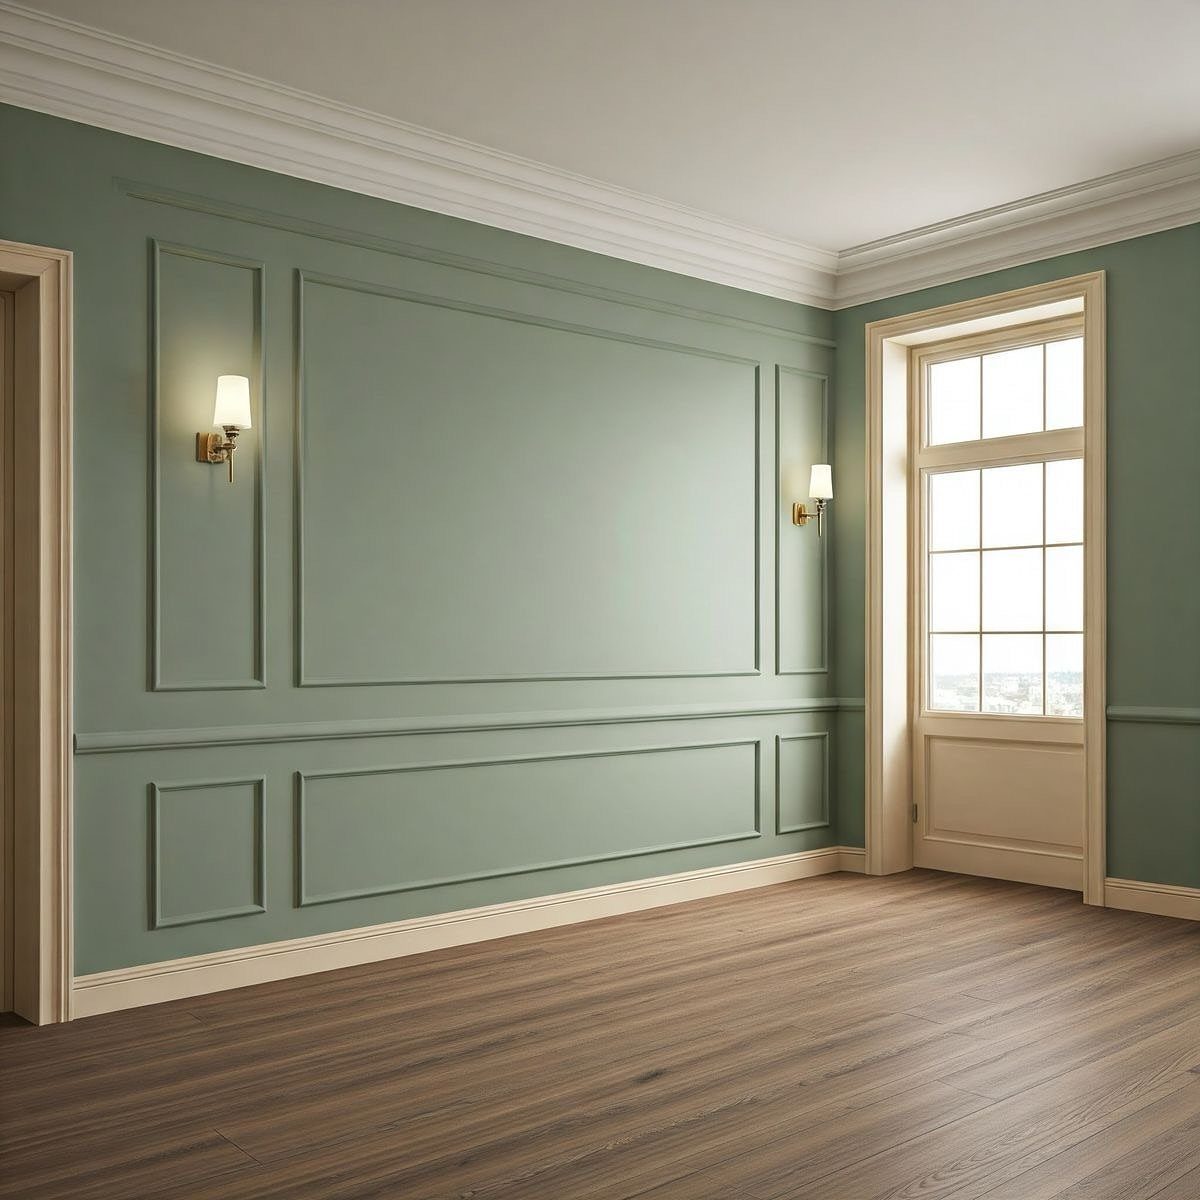
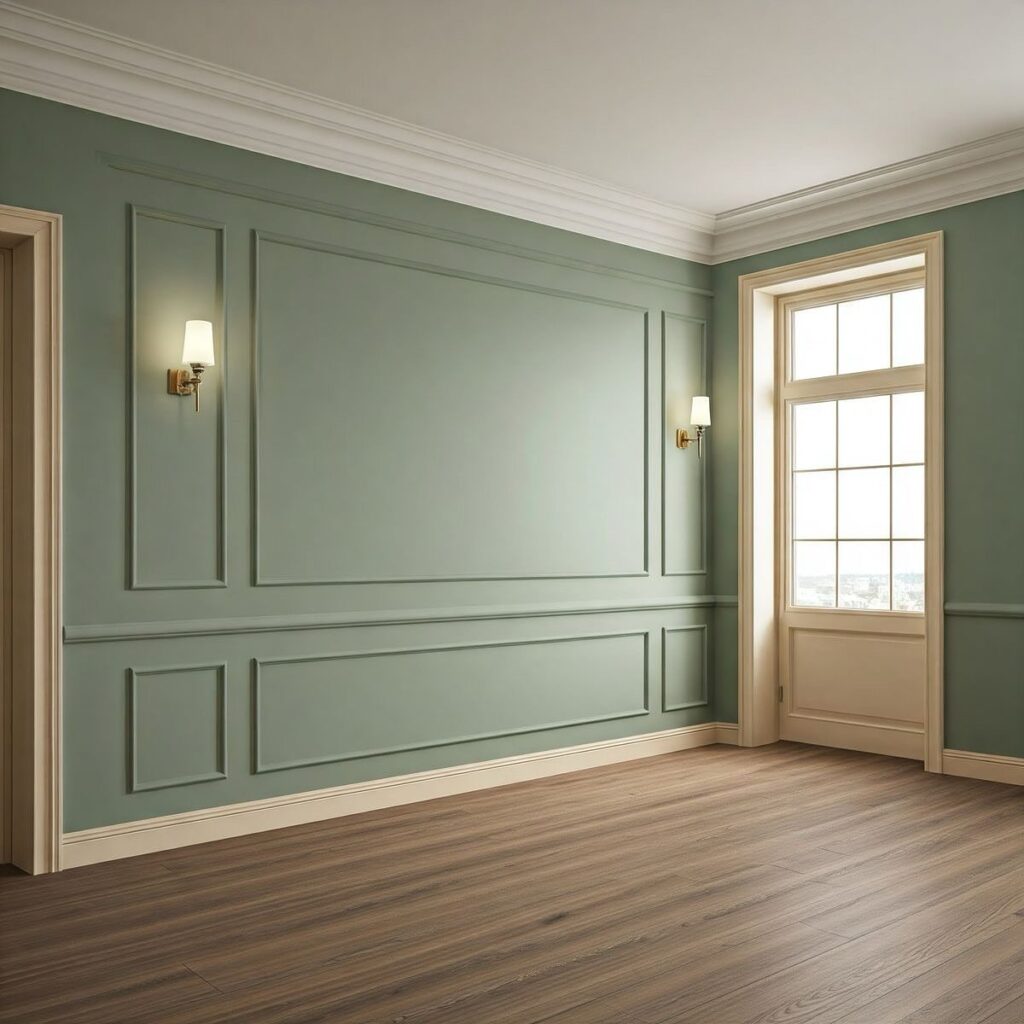
Sage green walls and crisp white trim make the molding itself the feature, not what hangs on it.
I built my first set with 1×3 primed MDF, a miter box, and a borrowed brad nailer; the lumber for a hallway ran surprisingly cheap.
Marking your layout on the wall before cutting anything saves the real headache; I snap painter’s tape into rectangles first and live with it for a day.
Paint the wall and molding the same color if you want quiet texture, or contrast them for something more architectural. Either way, caulk every seam before the final coat.
This one suits renters in older apartments too, since the holes are small and fillable when you move out.
2. Chair Rail and Picture Frame Molding
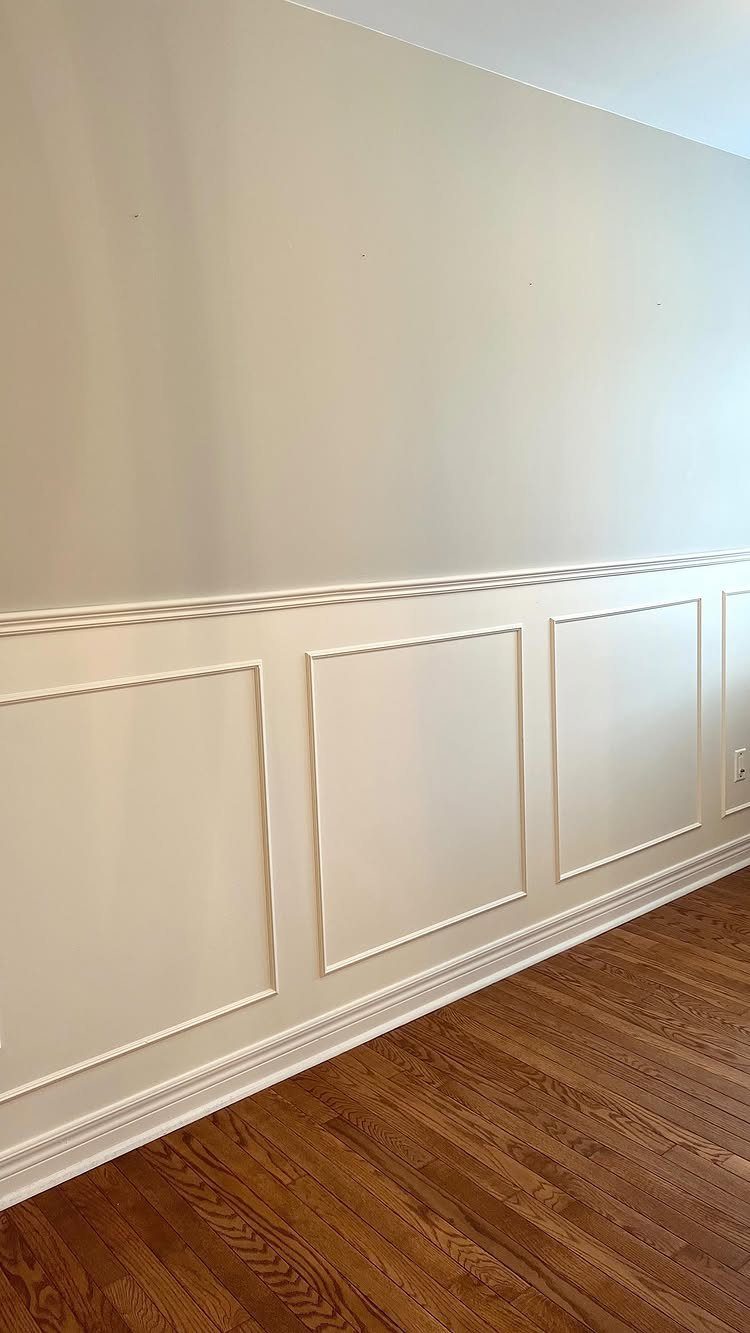
A chair rail at standard height splits the wall into two territories, and the picture frame molding lives below it where hands actually reach.
I like this in dining rooms because the rail takes the abuse that chairs dish out, and the molding below gives the lower half something to do besides scuff.
The same tools carry over: miter saw or box, brad nailer, level, stud finder. Ply cap trim works for the frames themselves, and a mid-width stock keeps the proportions right without feeling bulky.
Prime everything before it goes up; touching up in place never looks as clean.
Costs run a little higher than plain frame molding because you are buying the rail stock too, though it still lands in weekend-project territory.
Paint the lower half a shade darker if you want the room to feel grounded, or keep it all one color for a gallery hallway that does not fight your art.
3. Picture Frame Molding with Wallpaper Inserts
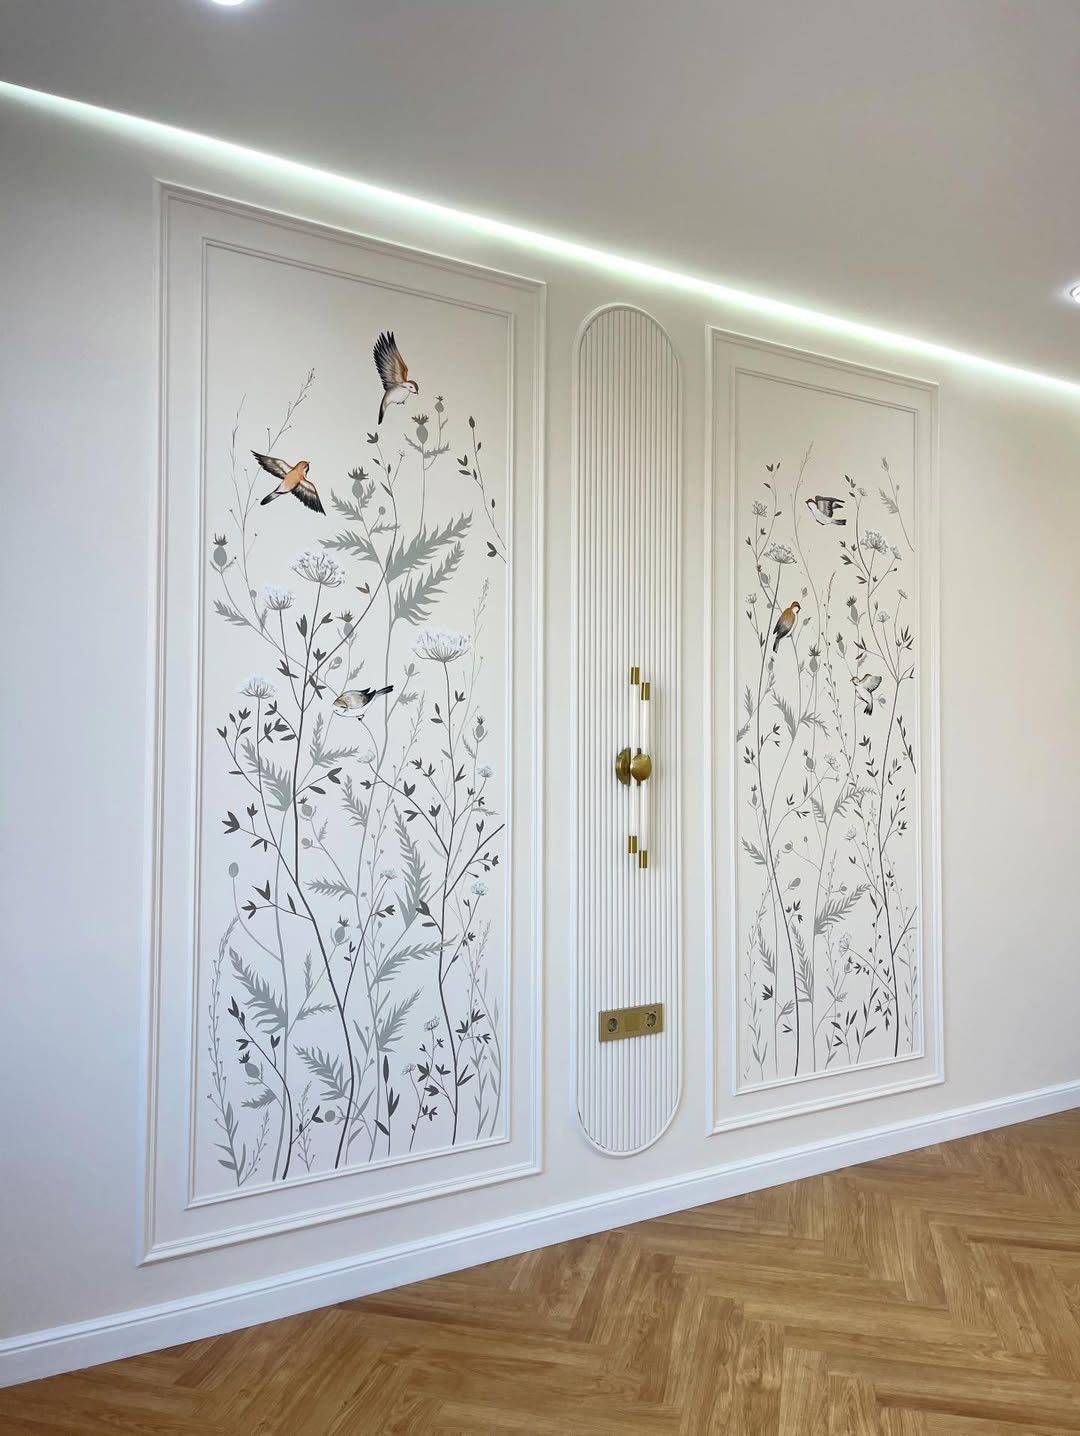
Botanical paper inside the frames turns the molding into a shadow box for something you cannot hang on a nail.
I have seen this done with leftover rolls from another room, which keeps the cost low if you plan it right.
Cut your wallpaper panels 1/2 inch smaller than the opening on all sides, then tack them to the wall inside the frame with double-sided tape before the molding goes up.
That way the pattern stays centered and you can swap it later without pulling trim.
A fluted panel between two frames adds extra texture; you can buy half-round reed molding by the foot and glue it to a flat backer, or skip it and keep the project to a single Saturday.
This one wins for renters who want pattern without paste on the whole wall, or for anyone whose taste changes with the seasons.
4. Framed Artwork with Picture Lights
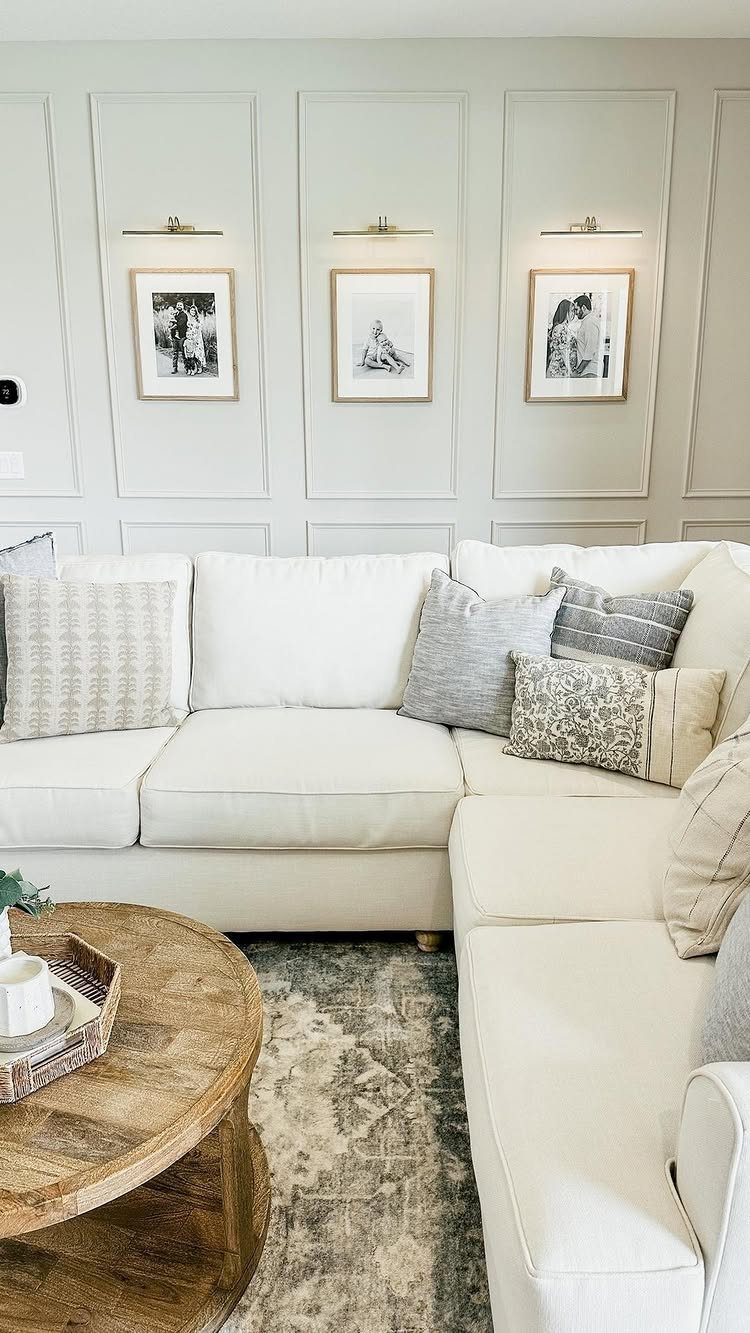
Brass picture lights clamp to the frame top and plug into a recessed outlet, or you can hardwire if the wall is open.
The choice matters more than the light itself: plug-in gives you flexibility to move pieces around, hardwire looks cleaner and stays out of reach from kids.
I wired my own during a bathroom renovation and still think about doing it everywhere else. The panels give you built-in spacing, so you are not eyeballing gaps between frames; the molding decides for you.
Black-and-white photography holds up under warm bulbs better than color, which goes muddy fast.
Decent brass picture lights run a noticeable cost per fixture, plus an electrician if you are not comfortable with romex.
This is the most expensive option here, and the one that feels finished enough for a room you actually sit in.
5. Molding Framed TV Accent Wall
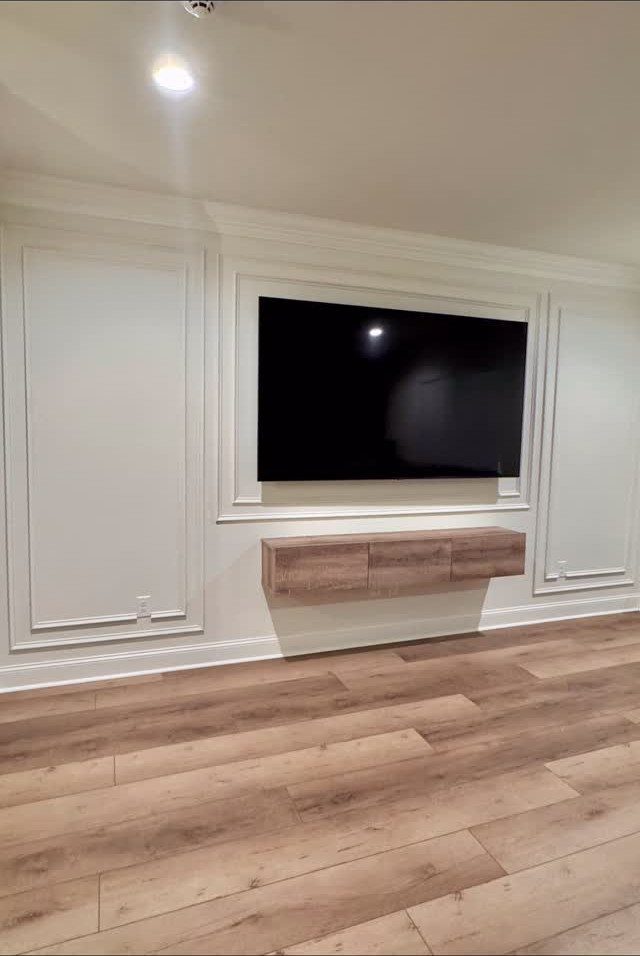
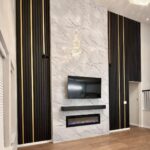
The television sits inside the frame like a painting, which only works if you plan the mount and the molding together.
I would build the frame slightly larger than the TV on all sides, and run the cables through the wall before the trim goes up; nothing ruins the gallery effect like a black cord dropping to a console.
Ply cap trim at medium width gives enough depth to feel intentional without swallowing the screen. Paint the recess behind the TV matte black so the bezel disappears when the set is off; a grey rectangle hangs there otherwise.
Floating consoles keep the floor visible and make vacuuming simple. This setup suits a bedroom or den where the TV is unavoidable but you do not want it to dominate.
6. Molding with Framed Art Inserts
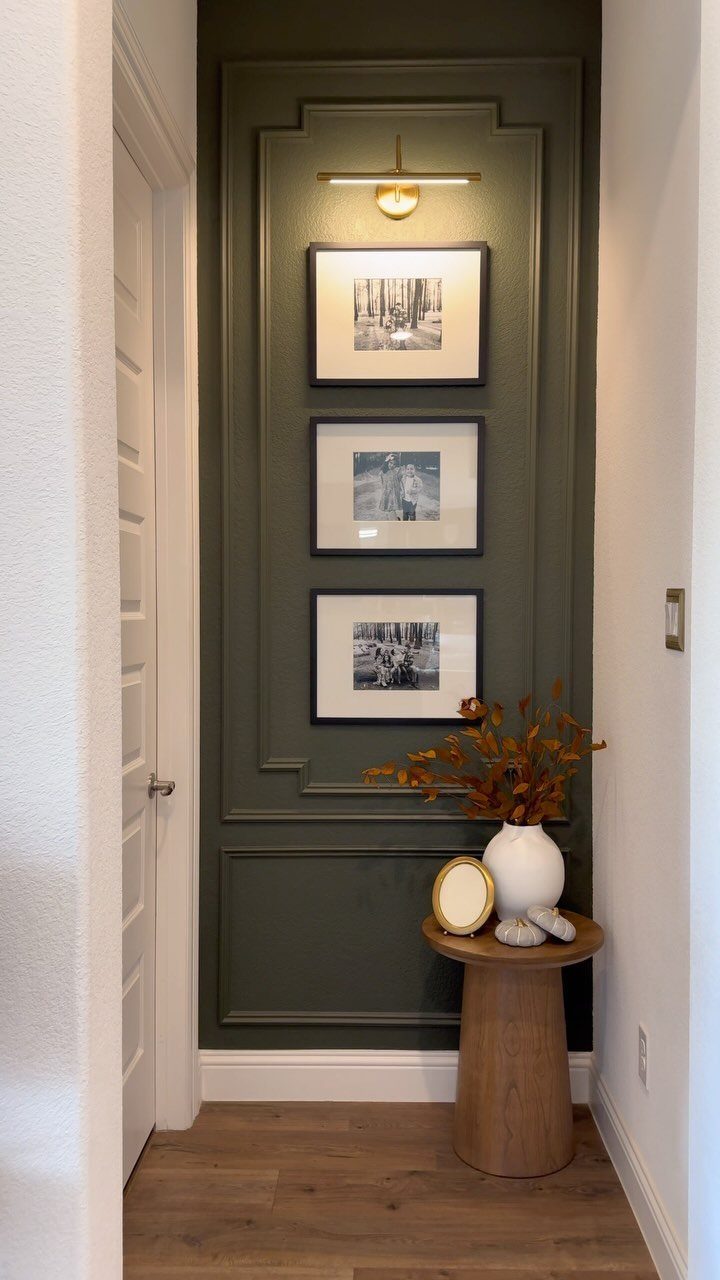
Hanging framed art inside the molding panels gives you two frames for the price of one, and the outer molding does the heavy lifting of making the wall feel designed.
I like thin black frames against dark green because the art floats forward instead of sinking in; white mats help too.
The brass picture light here is doing double duty, lighting both the photograph and the surrounding paint.
Check your frame depth before you buy: a standard rabbet frame sits almost flush, but a deep shadow box will read as bulky inside the molding.
This is the most forgiving option for anyone collecting art slowly. The molding stays, the frames swap, and the wall does not look half-finished while you hunt for the third piece that ties the other two together.
7. Contrasting Two-Tone Molding Wall
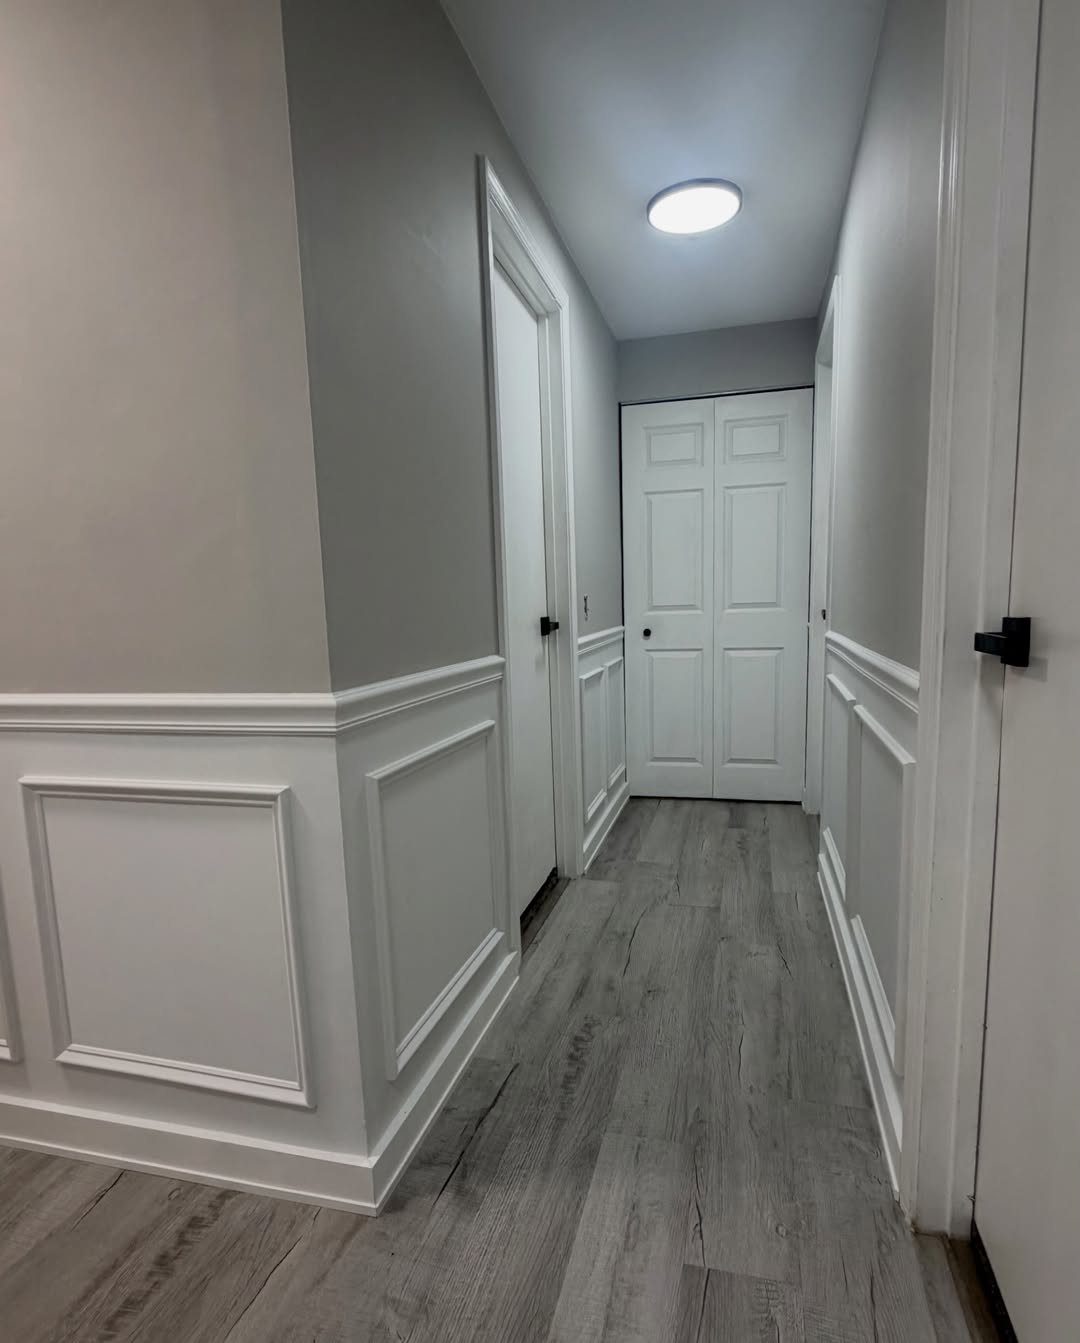
White picture frame molding against grey reads as wainscoting without the actual paneling, which keeps both cost and weight down.
The grey upper wall and white lower section split at chair rail height, and the molding itself carries the visual break.
Paint the molding before installation; raw wood panel molding needs primer plus a light sanding after the first coat so the grain doesn’t telegraph through. Chair rail usually arrives primed already.
I skip glue and rely on a brad nailer alone; it holds fine in a hallway that takes no real impact, and the molding comes off later without ripping drywall.
This suits renters or anyone testing the look before committing deeper. A small wobble risk shows up if someone leans hard, though hallways rarely see that kind of use.
8. Two-Tone Corner Accent Walls
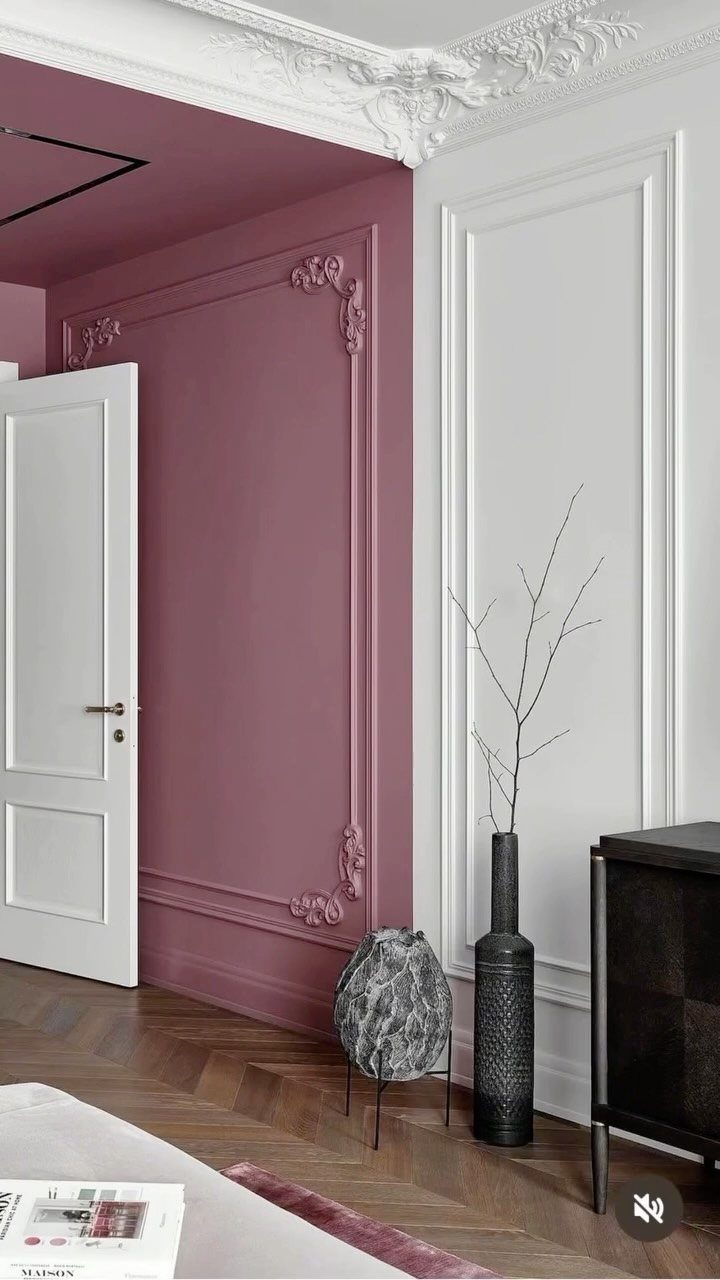
Dusty rose molding on one wall and white on the next turns a corner into an intentional moment rather than an awkward join.
The color follows the molding shape exactly, so the frame itself becomes the accent instead of what hangs inside it.
Full-height panels need careful alignment where the two walls meet; I measure from the floor up and from the corner out, then mark both walls before cutting anything.
Herringbone flooring already competes for attention, so keeping the molding color flat and matte avoids a third visual fight.
This works best when the corner is already a natural stopping point, like a doorway or a turn into another room.
The rose wall draws the eye first, the white one recedes, and the molding line gives your eye a path between them.
I would not try this in a cramped space; the contrast needs breathing room or it starts to feel like two rooms colliding.
Material Recommendations
Finger-jointed base cap molding gives the classic picture-frame profile without the cost of solid hardwood. The joints take paint well and the profile is consistent enough that miters line up clean.
A brad nailer is the right tool here; it sets the nail below the surface without hammer bounce that can dent soft trim.
You will also want a miter saw or a miter box and pull saw, a tape measure, a level or laser, caulk and a gun, filler for the nail holes, and sandpaper for the spots that need it.
Cross-line lasers speed up layout, though a 4-foot level and patience gets you to the same place.
Cut everything at once if your measurements are locked; a pencil mark on the back of each piece beats guessing angles while you are standing at the wall.
Project Breakdown
Scraps can fill a gap in a pinch, but running short mid-wall wastes more time than the extra trip to the store.
Break the work into days. Chair rail goes up first, roughly 30-36 inches from the floor depending on your ceiling height, and that single wall took me about 2 hours working alone.
Picture frame molding follows, 4 to 6 hours depending on how many boxes and how carefully you laid out the spacing.
Filling nail holes and running a caulk line still takes time, so I treat it as its own session rather than rushing it at the end.
Painting needs a full day; two people working together can knock out a standard room between 9 am and 2 pm with two coats.
Chair rail cuts on the bevel, not the miter; the saw blade angles through the thickness of the wood. Cut and install one piece at a time, checking your guide against the back of each piece before you commit.
Design Inspiration
A room with tall ceilings and heavy built-ins needs molding that can hold its own against all that vertical weight. An extra row of molding above the standard chair rail height adds that weight without clutter.
If the back wall is where your desk or sofa sits, that is the wall to load up; the others can stay quiet.
Pinterest boards help here, but only if you are searching for rooms with your ceiling height and your trim scale.
The same molding profile that reads as delicate in a grand foyer can look oversized in a standard bedroom, so I scale the trim to the room’s proportions rather than using one size everywhere.
Common Mistakes
Skip the construction adhesive. It grips harder than the drywall paper can hold, and removal tears the face off the wall.
Brad nails alone are enough in any space that does not take body blows; hallways and dining rooms qualify. If a joint loosens over years, a single fresh nail fixes it without re-gluing.
Measure from the long edge of every miter cut, the outside of the angle. A 1/4-inch drift between top and bottom pieces of the same box reads as wobbly from across the room.
Cut one complete box first, tape it to the wall, and live with the proportions overnight before cutting the rest. Label every piece on the back with its wall and position; trapezoids look identical until they are not.
The bead fills the hairline gap that paint alone cannot bridge, and it is the step that separates installed trim from finished trim.
Frequently Asked Questions
Is picture frame molding outdated?
Picture frame molding has a classic look that reads as intentional rather than dated, especially in newer builds that need more character.
Picture frame molding still fits a weekend budget and a renter’s lease, and it reads current in most rooms without looking like a period piece.
The look leans classic and traditional, which is different from dated; it depends on what you pair it with.
What kind of trim to use for an accent wall?
Ply cap trim works for picture frame molding, and mid-width stock keeps proportions right without bulk. Chair rail molding splits the wall at standard height, and an extra layer of ply cap above the rail can build a focal wall.
Can you install a picture frame molding accent wall on textured walls?
Yes, though orange peel texture is usually fine to cover directly. Rougher knockdown texture may need a skim coat of joint compound or a thin hardboard backer first for a smooth surface.
Caulk at every seam handles most of what wall texture would otherwise reveal.
What tools are needed for picture frame molding?
A miter saw or miter box, brad nailer, level, tape measure, and stud finder are the core set. A speed square, wood filler, caulk, and painter’s tape for layout round out what I actually reach for.
What is the best height for chair rail molding?
Chair rail typically lands at 30-36 inches high, with 35 inches working for a 9-foot ceiling.
How to style picture frames on a wall?
The molding itself does the styling work by giving built-in spacing and a designed grid. The outer molding stays permanent while the inner frames swap, so the wall never looks half-finished.